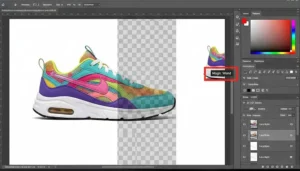
Removing white backgrounds in Photoshop may seem easy, but it requires skill and attention to detail. One way to remove white areas is by using the Magic Wand tool. This method may cause rough edges and imperfections. A better technique is to use layer masks to smooth blend the subject and create a professional look.
One way to remove white backgrounds is by using the Pen Tool to trace around the subject. It helps to create a precise clipping path selection that users can easily refine. This method allows for greater control over the selection process and produces smoother edges compared to automated tools. Try different techniques to find the best way for your project, like a product photo or a portrait.
Mastering these skills not only enhances your editing capabilities but also elevates the overall quality of your designs.
The Power of Background Removal in Photoshop
Background removal is an essential skill for any graphic designer or photo editor. You can separate your subject from the background to control the final image. You can put your image on any background you want by using a transparent background. This helps you make beautiful designs, product mockups, and professional graphics.
Removing white backgrounds is a common task that helps you integrate images into web designs, presentations, and digital projects.
Why Remove White Backgrounds: Importance for design projects?
Designers often use Photoshop to remove white backgrounds for various reasons, despite their usefulness in some cases.
- Enhanced Design Flexibility: By removing the white background, you essentially create a cutout of the image itself. You can put this cutout on a different background to use the image in different layers. This is crucial for things like product mockups, where you might want to show a product on a variety of different colored backgrounds.
- Enhanced Focus and Clarity: Removing the background helps to focus on the main subject to the viewers. This is important for product photos or portraits, where you want the attention on the product or person, not the background.
- Clean and Minimalist Aesthetic: A white background can sometimes look sterile or unfinished. Removing the background can make a design look cleaner and simpler, which modern design prefers.
- Creative Freedom: It allows for more creative options to create and sell. You can place the image on a textured background, add a background gradient, or even create photo montage art. This allows designers to create more visually interesting and engaging compositions.
Of course, there are situations where using a white background is perfectly acceptable and even preferable. Photoshop Remove white backgrounds can make design projects more flexible, improve image focus, and create a better design.
Benefits of Using Photoshop for Background Removal
- Precision: Tools like the Quick Selection Tool and Pen Tool allow for meticulous selection and removal of backgrounds quickly.
- Quality: Photoshop maintains the integrity of your image quality and ensures high-resolution outputs.
- Efficiency: With practice, Photoshop can help streamline the workflow for your graphic design projects.
- Flexibility: Photoshop has many tools that help to edit different images and projects in various designs.
Step-by-Step Guide to Removing a White Background in Photoshop
Photoshop has many tools to remove the background from your image. Some are quick, some give better quality. Check out the tools below that you prefer to use for your design project.
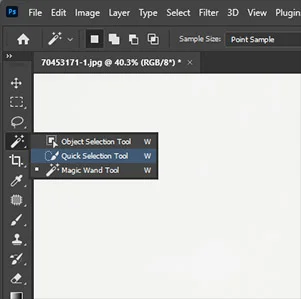
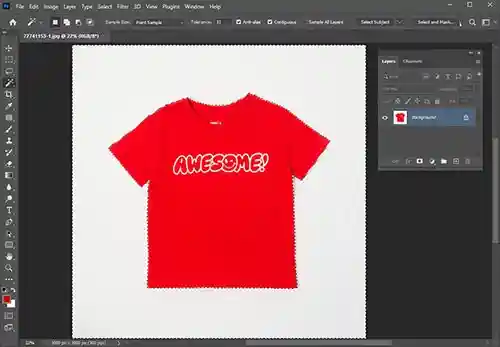
Using the Quick Selection Tool
- Open Your Image: Start by opening your image in Photoshop.
- Select the Quick Selection Tool: In the toolbar, choose “Quick Selection Tool” (shortcut: W).
- Make a Selection: Click and drag over the white background to select it. Adjust the brush size as needed for better control.
- Refine the Edge: To smooth the edges of the subject, select the “Select and Mask” option in the menu bar. Then, use the Refine Edge Brush Tool to make the edges of your selection more precise.
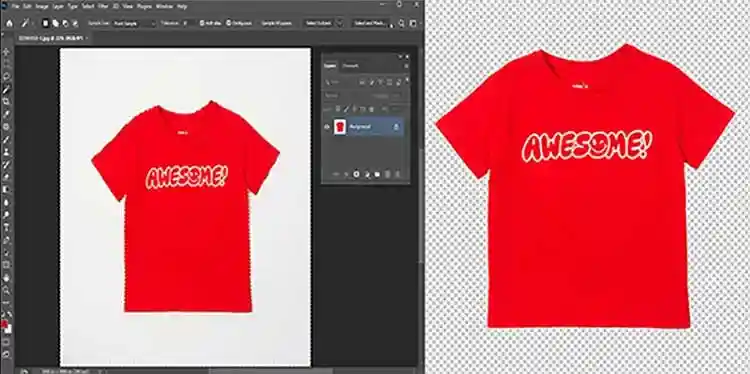
- Remove the Background: Press Delete or Backspace to remove the white background.
- Save Your Image: Go to File > Save As and choose the PNG format to maintain transparency.
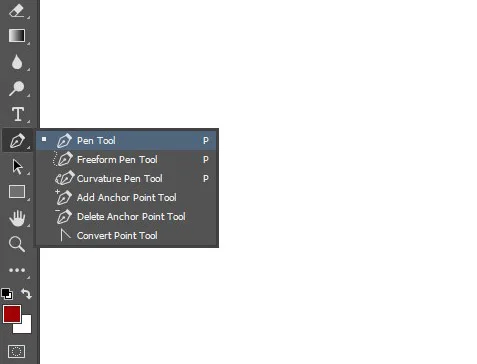
Using the Pen Tool
- Open the image you want to edit in Photoshop.
- To choose the Pen Tool, click the pen icon in the toolbar or press P as a shortcut.
- Click to create anchor points around the subject, carefully tracing its outline.
- Once path creation is complete around the edge of the subject, right-click and choose “Make Selection.”
- Press Delete or Backspace to remove the white background.
- Save your image in PNG format to preserve the transparent background.
To learn more about how to create a pixel-perfect clipping path, click here to see the details.
Refining the Edges for a Clean Finish
Achieving a clean finish is crucial for professional-looking images. Use the following tips to refine the edges:
- Feathering: Apply a slight feather like 0.2 px to soften the edges.
- Contrast and Radius: Adjust the contrast and radius settings in the Select and Mask workspace to sharpen the edges.
- Brush Tool: Use the Brush Tool to manually refine edges and correct any imperfections in the layers panel.

Troubleshooting Common Issues
Dealing with Hair and Fur: Handling images of hair and fur can be tricky because of their delicate and see-through qualities. Here are some helpful tips for achieving a clean cut-out:
- If possible, increase the contrast between the hair/fur and the background during the photoshoot with proper lighting. This can significantly improve the selection process later.
- Use the Refine Edge tool to adjust the selection, focusing on stray strands and areas where the hair blends into the background.
- For better selection based on color or contrast, use “Channel Masking” to make a specific selection of hair.
Saving and Exporting Your Image
After successfully removing the background from the image, it’s important to save your image in the appropriate format:
- PNG: Ideal for maintaining transparency.
- JPEG: Suitable for images without the need for transparency but with a small file size.
- PSD: Recommended for projects that require further editing.

In conclusion, mastering the art of removing white backgrounds in Photoshop requires skill and precision. While the Magic Wand tool may offer a quick solution, using layer masks or the Pen Tool can produce more professional and refined results. Try out different photo editing techniques to find the best one for your project, like product photography or portraits.
Improving these skills will make you better at editing and improving the quality of your designs. Take the time to practice and refine your techniques to achieve seamless results in your editing endeavors.