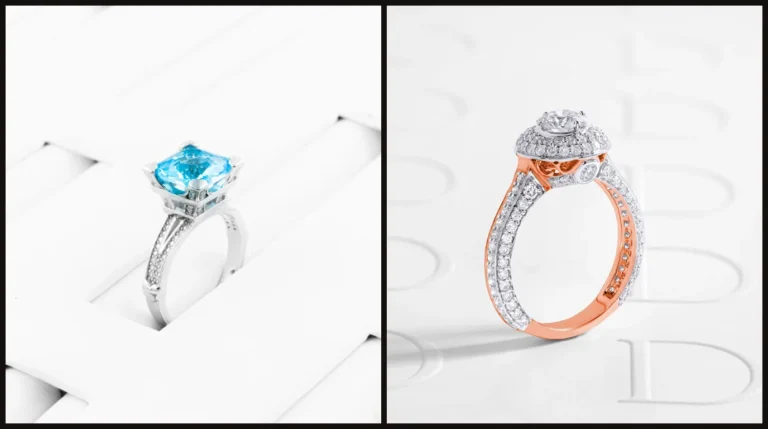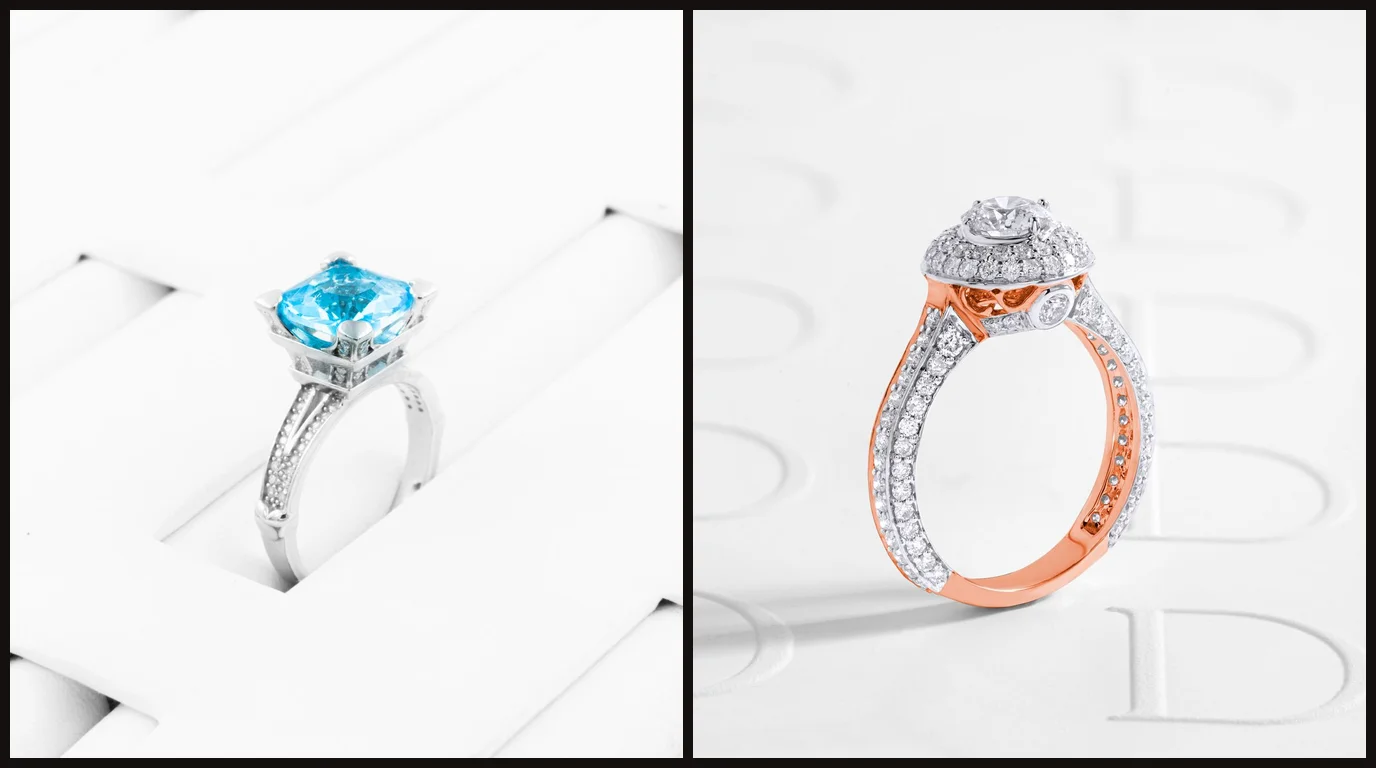
The image size for Shopify product photos that Shopify recommends is 2048 x 2048 pixels for square images. Uploads must stay under 20 MB, and every main image should share one aspect ratio, because your theme crops anything that doesn’t fit its product cards.
Quick answer:
- Export product photos as 2048 x 2048 px squares.
- Keep each file under 20 MB and under 20 megapixels.
- Use one aspect ratio for every main image in the store.
- Keep the piece centered with margin, so card crops keep it.
- Set a focal point on the stone in the Shopify admin.
This guide sizes one diamond ring for a Shopify store, because a small, shiny piece shows every crop and every soft pixel. If you sell on more than one channel, start with our online store product image size guide and come back here for the Shopify part.
What Shopify’s product image rules say
Shopify’s product image rules are short: a recommended square size, an upload ceiling, a list of formats and one piece of layout advice. Unlike Amazon, Shopify sets no background or fill rule. How the photo is cropped is up to your theme.
| Shopify rule | What Shopify says | What it means for a small piece |
|---|---|---|
| Recommended size | 2048 x 2048 px usually displays best for square product images | Enough pixels for a buyer to zoom on a stone |
| Largest upload | Up to 5000 x 5000 px or 25 megapixels on one help page; 20 megapixels on another | Stay under 20 megapixels to pass both |
| File size | Under 20 MB | Any sensible JPEG passes; camera files may not |
| File type | PNG is best, then JPEG; TIFF, BMP, GIF, SVG, HEIC and WebP are accepted | A JPEG keeps the file light; PNG suits flat graphics |
| Aspect ratio | Use one aspect ratio for all featured and main images | One square master for every piece keeps the grid even |
The sources are Shopify’s own help pages on product media types, theme images and focal points. The two pages disagree on the megapixel ceiling, so the safe Shopify image dimensions are anything up to 20 megapixels. A 2048 px square is 4.2 megapixels, well inside both.
Why your theme decides the crop
Shopify stores the photo you upload, but the theme decides the shape buyers see. When a photo’s aspect ratio differs from a section’s image area, Shopify’s help says the section crops the image to fit. On a tall phone screen, wide images can lose their left and right edges.
A ring photographed off-center can lose its stone in a portrait product card, and a mix of square and landscape photos makes a collection grid look uneven. Any Shopify picture size works only if the piece sits where every crop keeps it.
Shopify handles this with a focal point. Set one on the stone, and Shopify keeps that spot in frame wherever the theme crops the image. It works on Shopify’s free themes, including Dawn 7.0.0 and later and the Horizon family; for other themes, check the theme’s documentation.
What you need before you start
| What | Why it matters | Minimum |
|---|---|---|
| A photo larger than 2048 px | Enlarging a smaller photo softens the stone | 2048 px on the shortest side, straight from the camera |
| Photoshop or another editor | You need a square crop, Image Size and Export | Any editor that resizes and shows file size |
| A square master file | Every Shopify export starts from it | The full-resolution photo, cropped square, kept with its layers |
| Shopify admin access | Focal points and alt text are set per image | Permission to edit products |
What retouching can’t fix
A photo shot below 2048 px cannot be enlarged to Shopify’s size without losing detail. A stone shot out of focus stays soft at any size. A piece cropped tight in camera has no margin left for a portrait card crop, so it has to be shot again with room around it.
Where the line sits
Cleaning dust, evening the background and correcting color are accepted. Making a stone look clearer, larger or a different color misrepresents the piece. The FTC’s Jewelry Guides cover how pieces are described to US buyers, and the UK’s CAP Code applies the same test to ads there.
How to set the product image size for Shopify: 6 steps
Allow 25 to 45 minutes for the first product; later photos from the same master take a few minutes each. The steps use Photoshop, but any editor with guides and an export dialog works.
Step 1: Make a square master under 20 megapixels (3 to 5 min)
Shopify’s grid looks even only when every main image has the same shape, so start square.
- Open the full-resolution photo and duplicate it, so the original stays untouched.
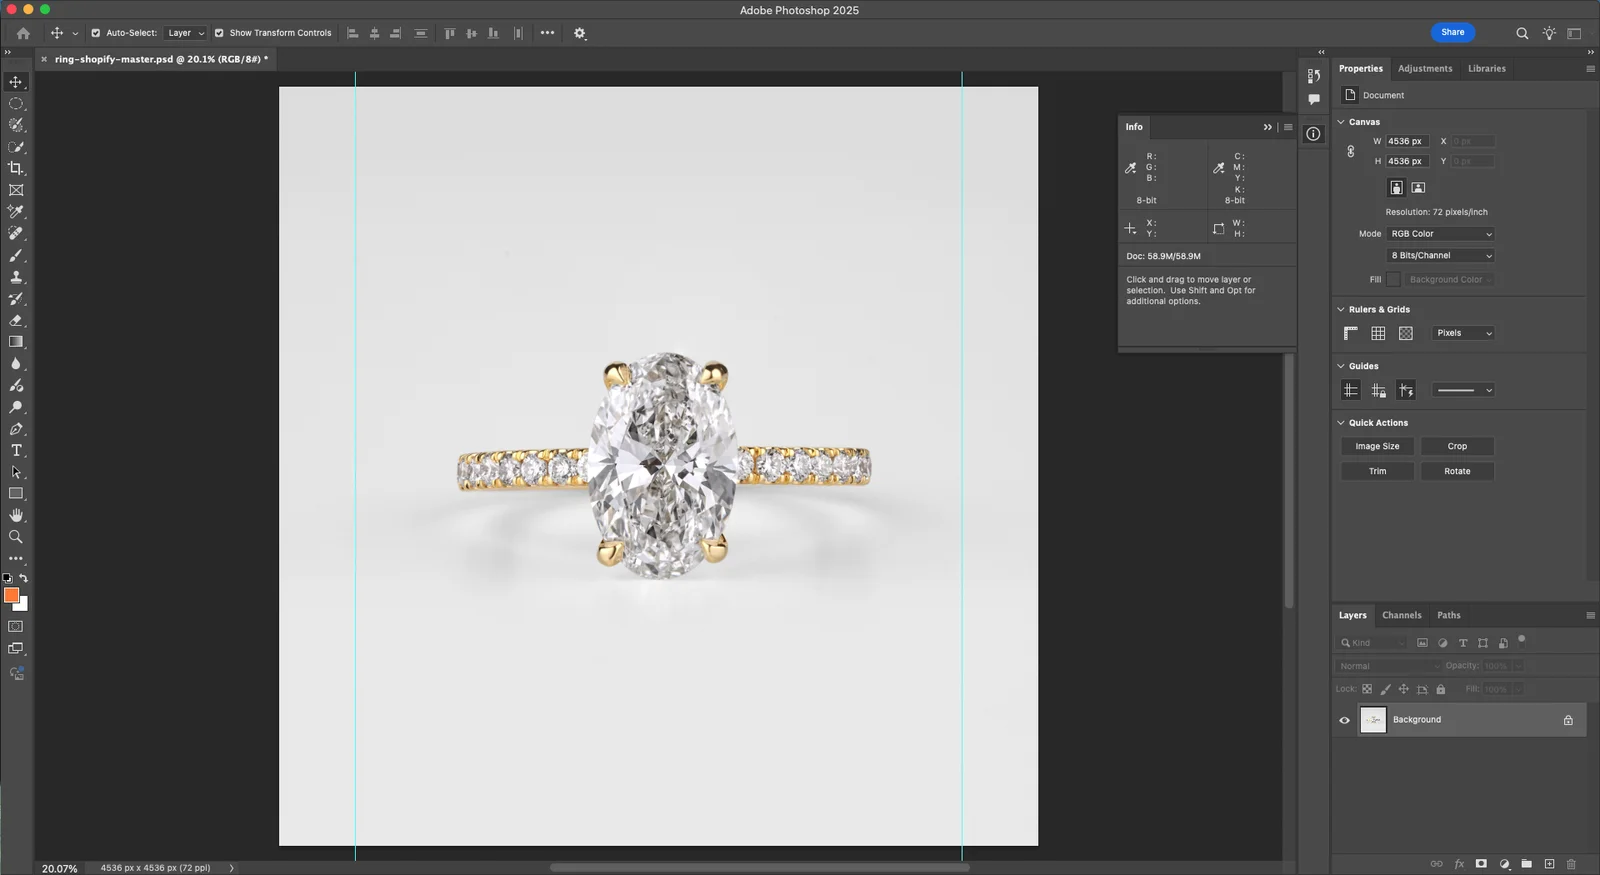
- If the photo isn’t square, use the Crop Tool with the ratio set to 1:1 (Square), and crop around the piece with even space on all sides.
- Check the size in the Properties or Info panel. Our ring photo was 4536 x 4536 px, which is 20.6 megapixels, just over the 20-megapixel limit on one of Shopify’s pages. That is a reason to resize, never to upload the camera file.
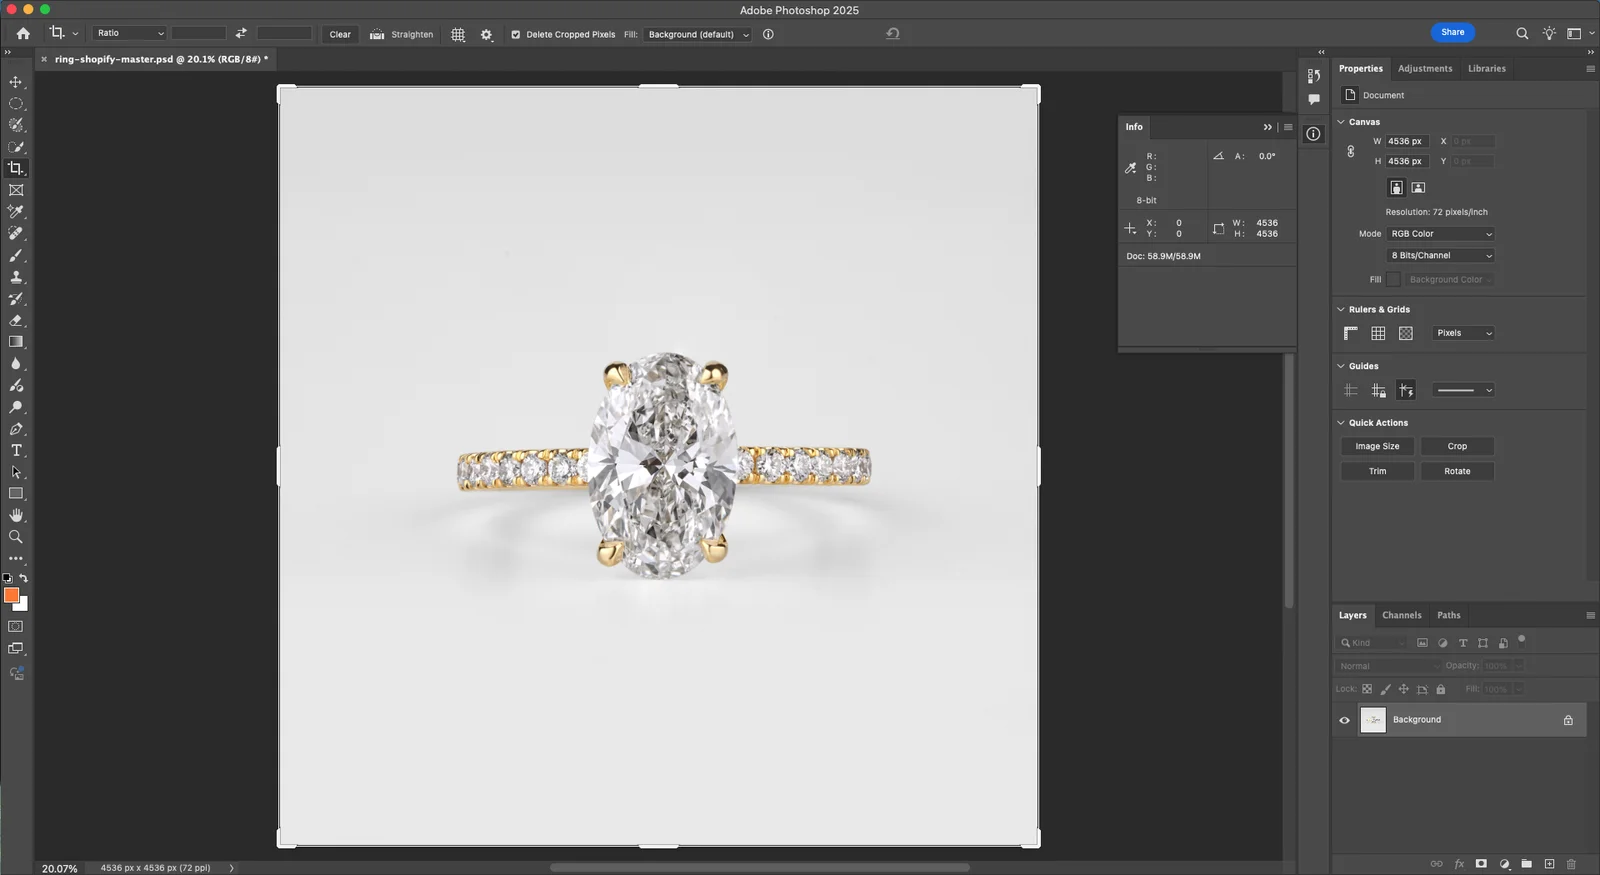
Step 2: Keep the stone inside the crop-safe area (5 to 10 min)
Some themes show product cards in portrait, so plan for a crop you won’t see in the admin.
- Add guides for a 4:5 portrait crop inside the square (View > Guides > New Guide Layout), 10% in from the left and right edges.
- Size the piece so it is clearly the subject but stays between the guides.
- Keep the stone near the center. Step 6 pins it there with a focal point.
Tip: Zoom out until the image is about 250 px wide on screen, roughly a product card on a phone. If you can’t read the stone at that size, buyers can’t either.
Etsy also crops its thumbnails, into square, portrait and landscape views. If you list there too, our Etsy listing photo size guide uses the same square master, with guides for those crops.
Step 3: Resize to 2048 x 2048 px (2 min)
Resize a copy, never the master, so a later change can be exported again at full quality.
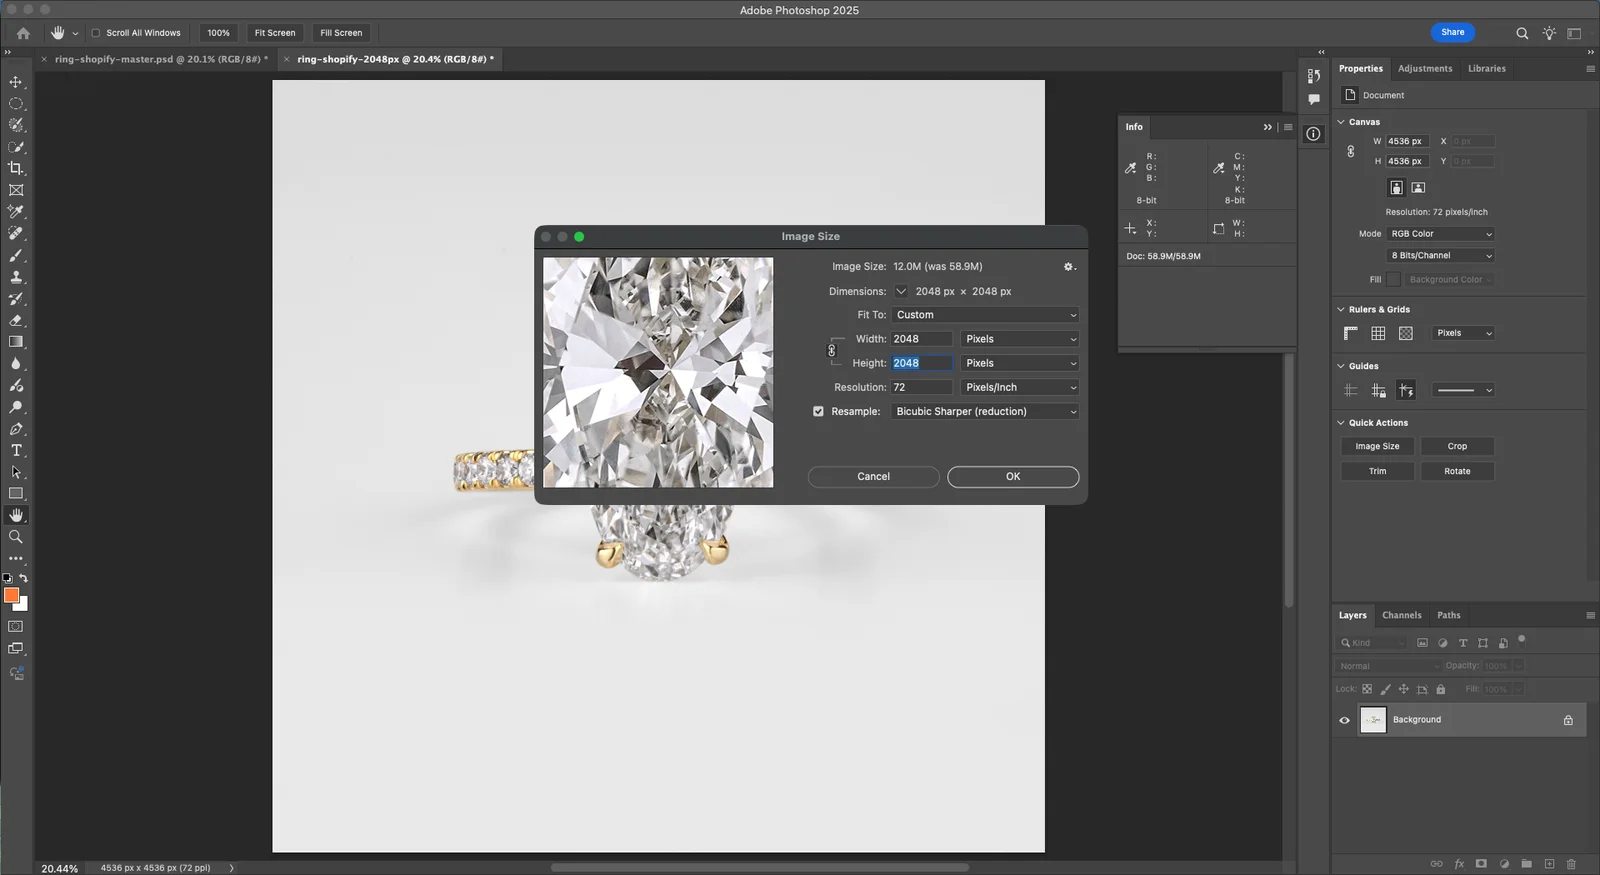
- Choose Image > Duplicate, then Image > Image Size.
- Set Width to 2048 Pixels with the chain linked, so Height also reads 2048, and Resolution to 72.
- Set Resample to Bicubic Sharper (reduction) and click OK.
Step 4: Check the background and the stone at 100% (10 to 20 min)
Shopify doesn’t require a white background, but a collection grid shows every difference between neighboring photos.
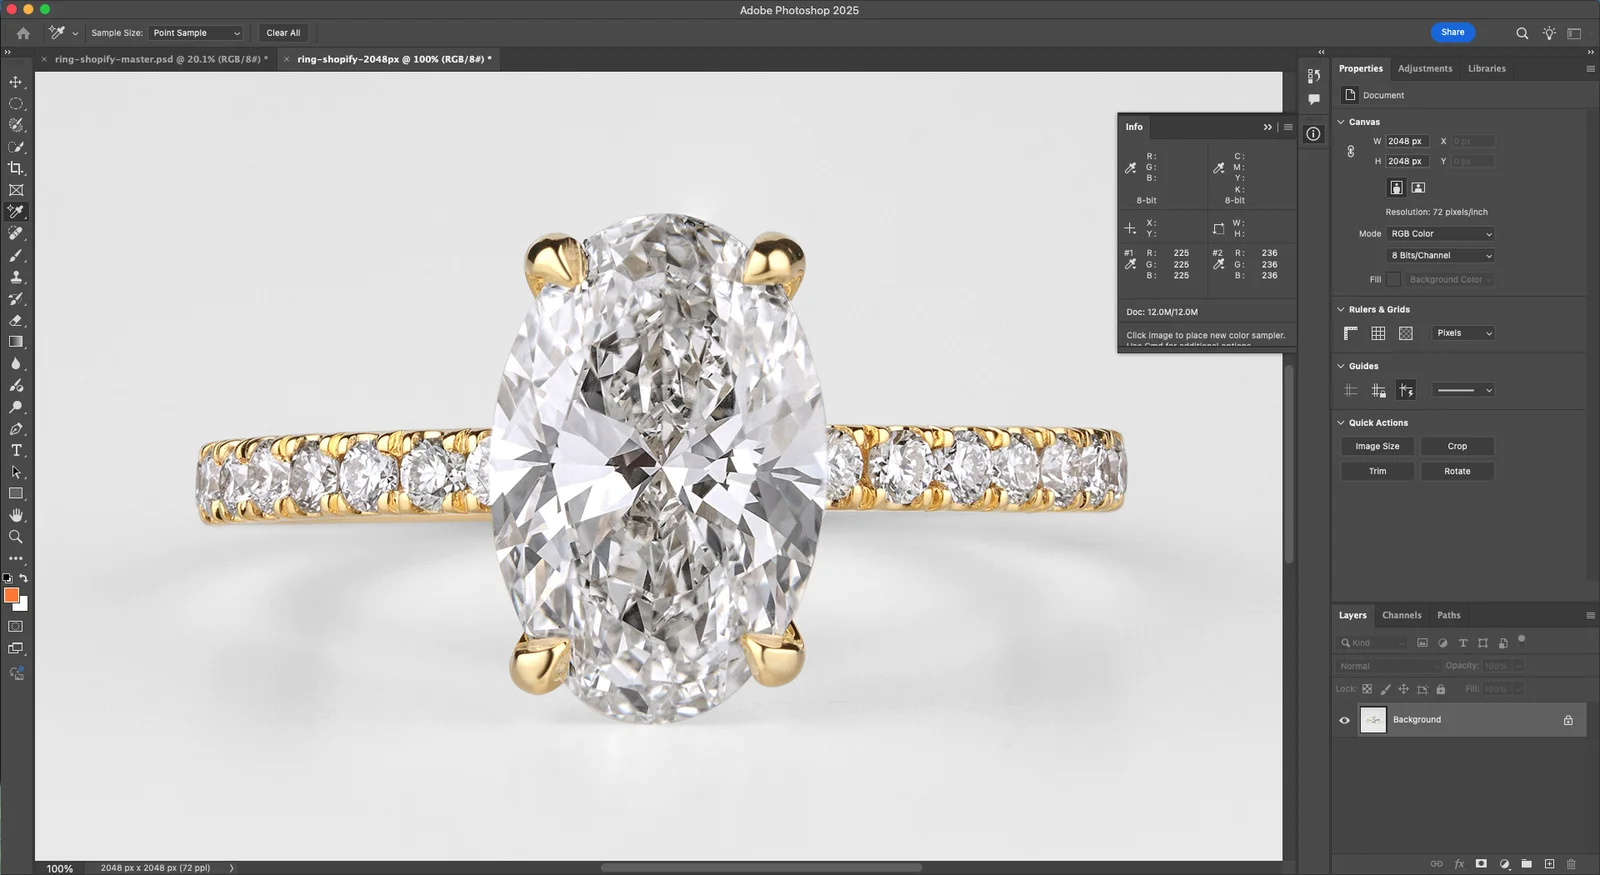
- Open Window > Info and sample the background in two corners. Matching values across your products keep the grid even.
- Zoom to 100% on the stone. Its facets should be sharp, with no halo from earlier sharpening.
- Check the edge of the band at 100% for a gray fringe left by a cutout.
On our ring, the top-left corner read 225 and the bottom-right corner 236: a soft gradient from the studio light. That is fine on its own, but beside a product shot on pure white it reads as gray.
Step 5: Export a JPEG in sRGB (2 to 5 min)
Shopify’s CDN serves smaller versions to each device, so the upload is your quality ceiling, not the file buyers download.
- Choose File > Export > Save for Web (Legacy) and set the format to JPEG.
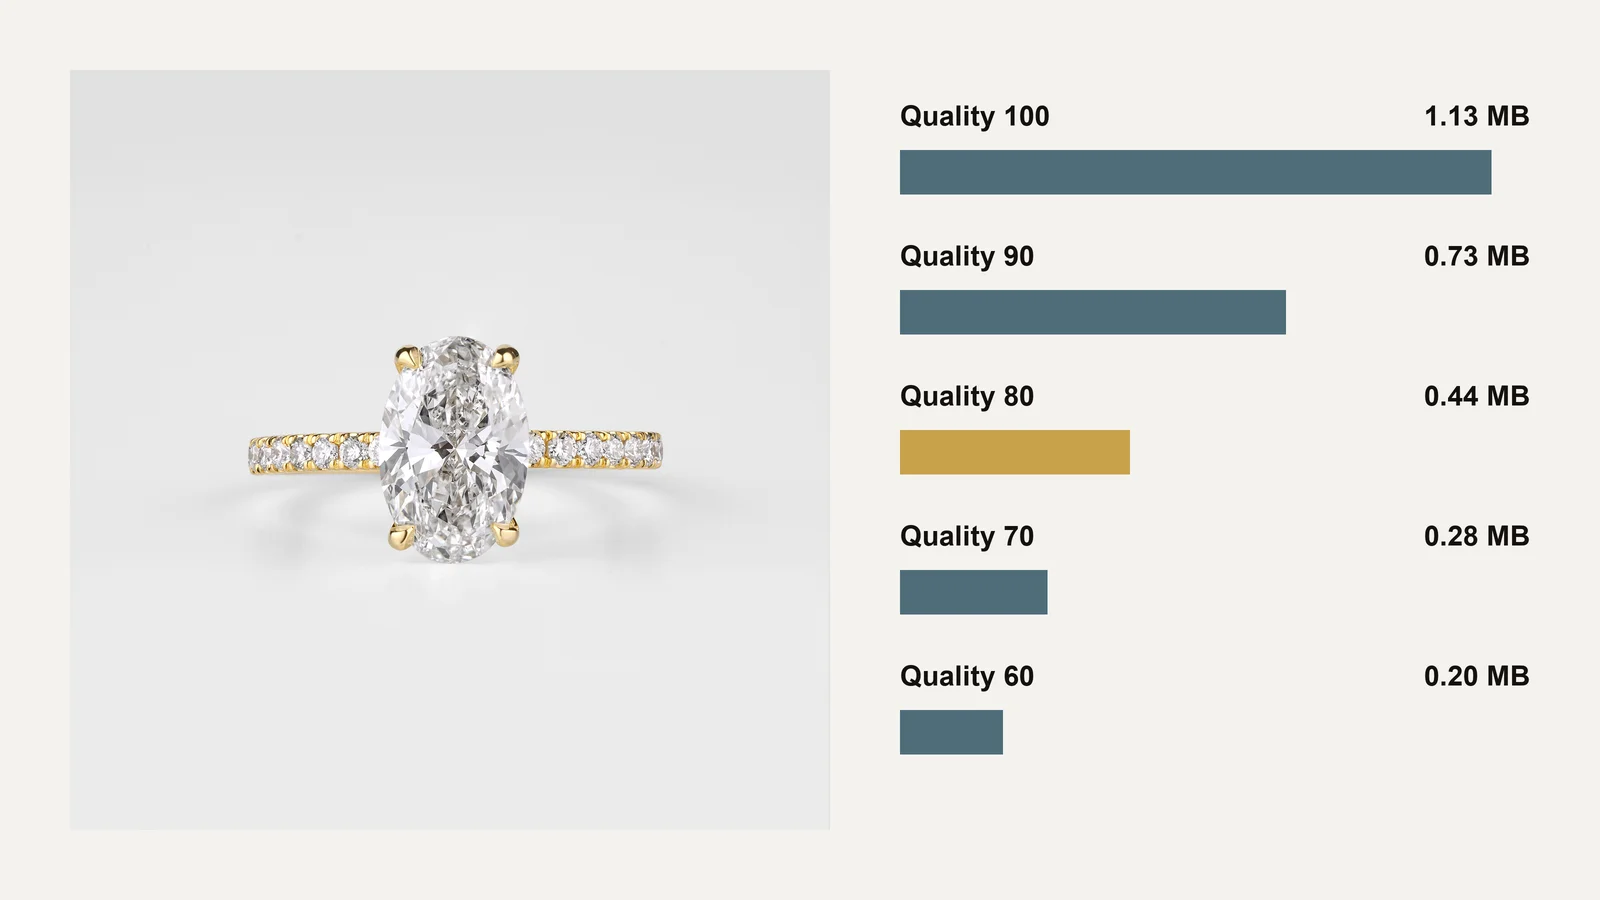
- Set Quality to 80 and tick Convert to sRGB, so colors match across browsers.
- Read the file size under the preview, check the stone at 100%, then save.
Our 2048 px ring saved at 0.44 MB at quality 80, and even quality 100 came to 1.13 MB. Every setting is far under Shopify’s 20 MB limit, so pick the quality by eye, not by file size.
Step 6: Upload, set the focal point and write the alt text (3 to 5 min)
The last settings live in the Shopify admin, on each image.
- In Products, open the product and add the photo in the Media section. Drag it first if it is the main image.
- Click the image, then click the stone or drag the blue dot onto it, and click Save. That is the focal point.
- Add alt text that describes the piece: metal, stone and style, as a buyer would search for it.
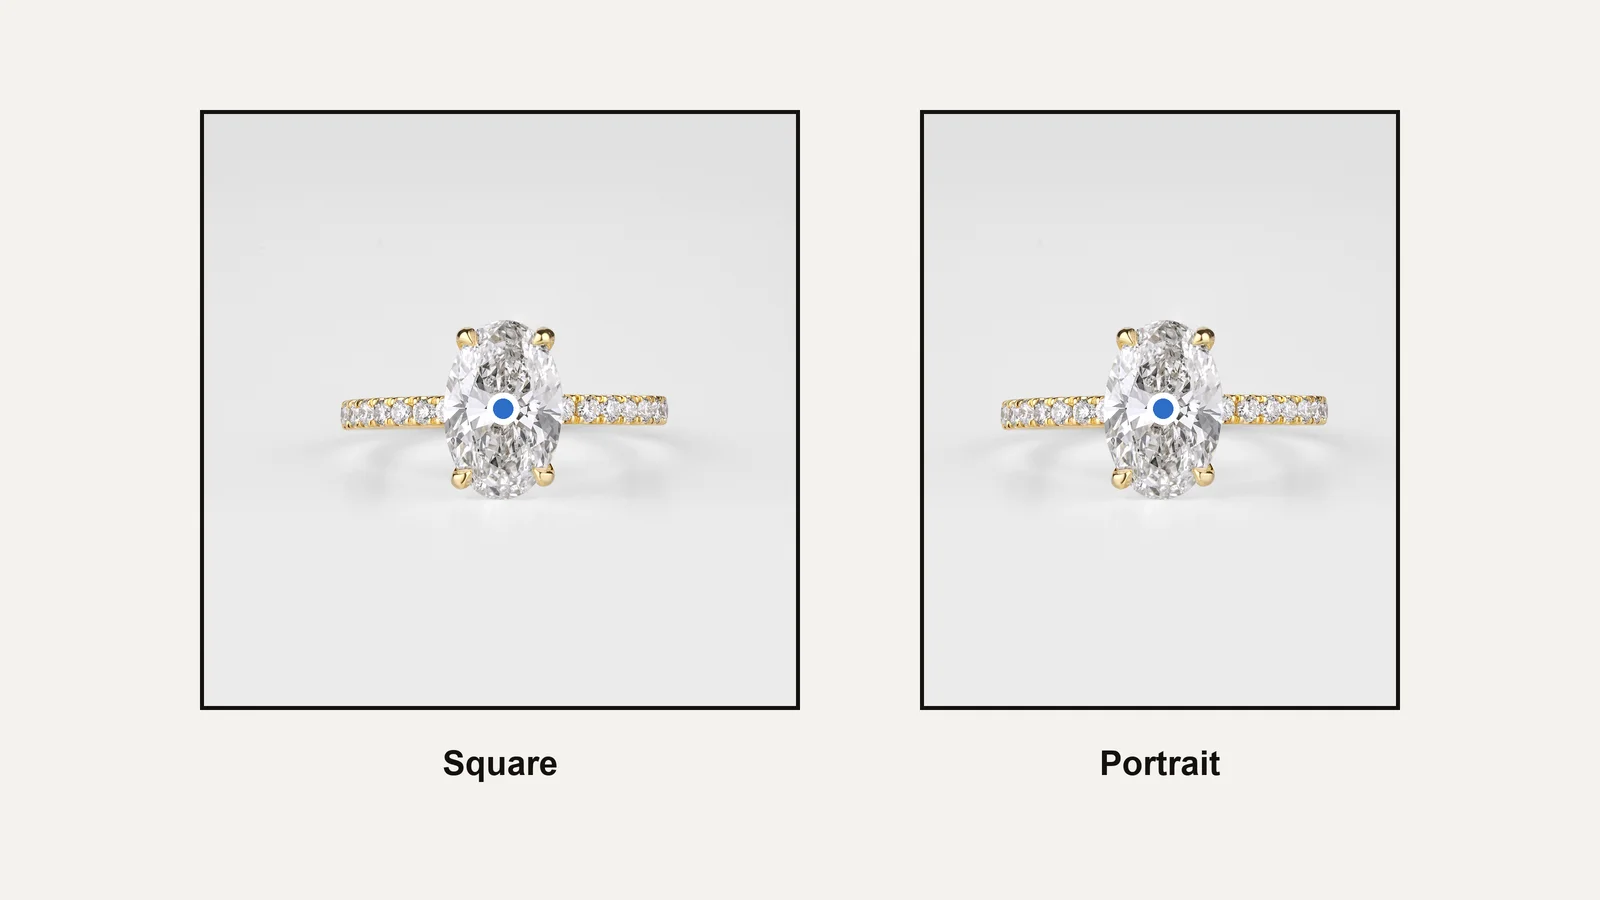
Shopify product image size for every photo in the gallery
The main image is only the first of several. Keep every photo of a product at the same square shape, so the gallery doesn’t jump in height when a buyer swipes. The same Shopify photo size suits the on-hand shot, the side view and the detail of the setting.
- Main image: the piece on a plain background, centered, with the focal point on the stone.
- Detail shots: still 2048 px squares, framed closer on the setting or the clasp.
- Variant images: one per metal or stone option, shot and cropped the same way, so switching variants doesn’t shift the layout.
- Lifestyle or on-hand shots: square too, with the piece away from the edges.
What Shopify accepts but buyers notice
Some files pass every Shopify rule and still lose sales. A photo enlarged to 2048 px from a smaller original uploads fine but looks soft at zoom. A background that is nearly white sits beside pure white in the grid and looks gray. A stone sharpened too hard shows a white halo when a buyer zooms in.
Fixing those takes jewelry photo retouching: rebuilding the background, recovering the metal and bringing the facets back without inventing them. It starts from the full-resolution master, which is another reason to keep it.
Common mistakes
| Mistake | What it looks like | Fix |
|---|---|---|
| Mixed aspect ratios | An uneven collection grid | One square master for every main image |
| Uploading the camera file | An upload rejected for size or megapixels | Resize to 2048 px and export a JPEG |
| Stone near the edge | A portrait card crops the stone | Keep it between the 4:5 guides |
| No focal point | The theme crops the piece from the center of the frame, not the stone | Set the focal point on the stone |
| Upscaling to 2048 px | A soft, smeared stone at zoom | Shoot larger than 2048 px |
| Different backgrounds per product | A grid that looks patchy | Match the corner values in the Info panel |
Do it yourself or outsource?
If you add a few products a month and your photos already start large with clean backgrounds, do it yourself. The six steps are quick once the master files exist.
| Doing it yourself works when | Outsourcing works when |
|---|---|
| You add a few products at a time | You launch a full collection at once |
| Your backgrounds already match | Each photo needs the background rebuilt to match the grid |
| Your pieces are plain metal | Stones need work at 100% zoom |
If each photo needs 20 minutes of cleanup before the export steps, a product with six photos is two hours, and a 30-product collection is 60 hours. Our guide to one master file for every sales channel shows how to keep that work to one pass.
A professional jewelry retoucher can take the cleanup off your desk: every file gets a second check at 100% zoom, and most orders come back within 24 hours.
Send us your trial images. It’s free, with no card or sign-up.
Frequently asked questions
Shopify recommends 2048 x 2048 pixels for square product images. Use the same square shape for every main image, so your collection grid stays even.
Files must be under 20 MB. Shopify’s help pages give 20 or 25 megapixels as the ceiling, so stay under 20 megapixels, about 4470 x 4470 px for a square.
It is usually a camera file over 20 MB or over 20 megapixels. Resize it to 2048 px and export a JPEG, which is far below both limits.
Shopify doesn’t require square, but it asks for one aspect ratio across main images, and recommends 2048 x 2048 px for squares. Square is the simplest shape to keep consistent.
Shopify’s CDN optimizes images and serves formats each browser supports, so buyers get smaller files than you upload. The upload still sets the best quality they can see.
Shopify lists PNG as the best format, then JPEG. For jewelry photos, a JPEG at quality 80 keeps the file light; check the stone at 100% before you upload.