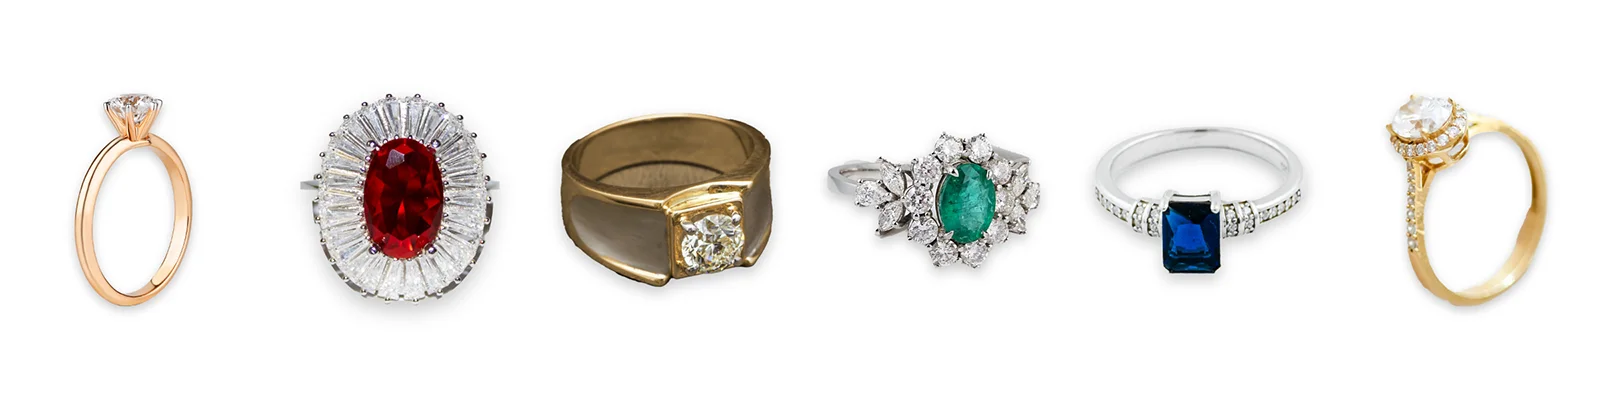
Ring collection sample: six photos from six photographers, retouched into one consistent collection.
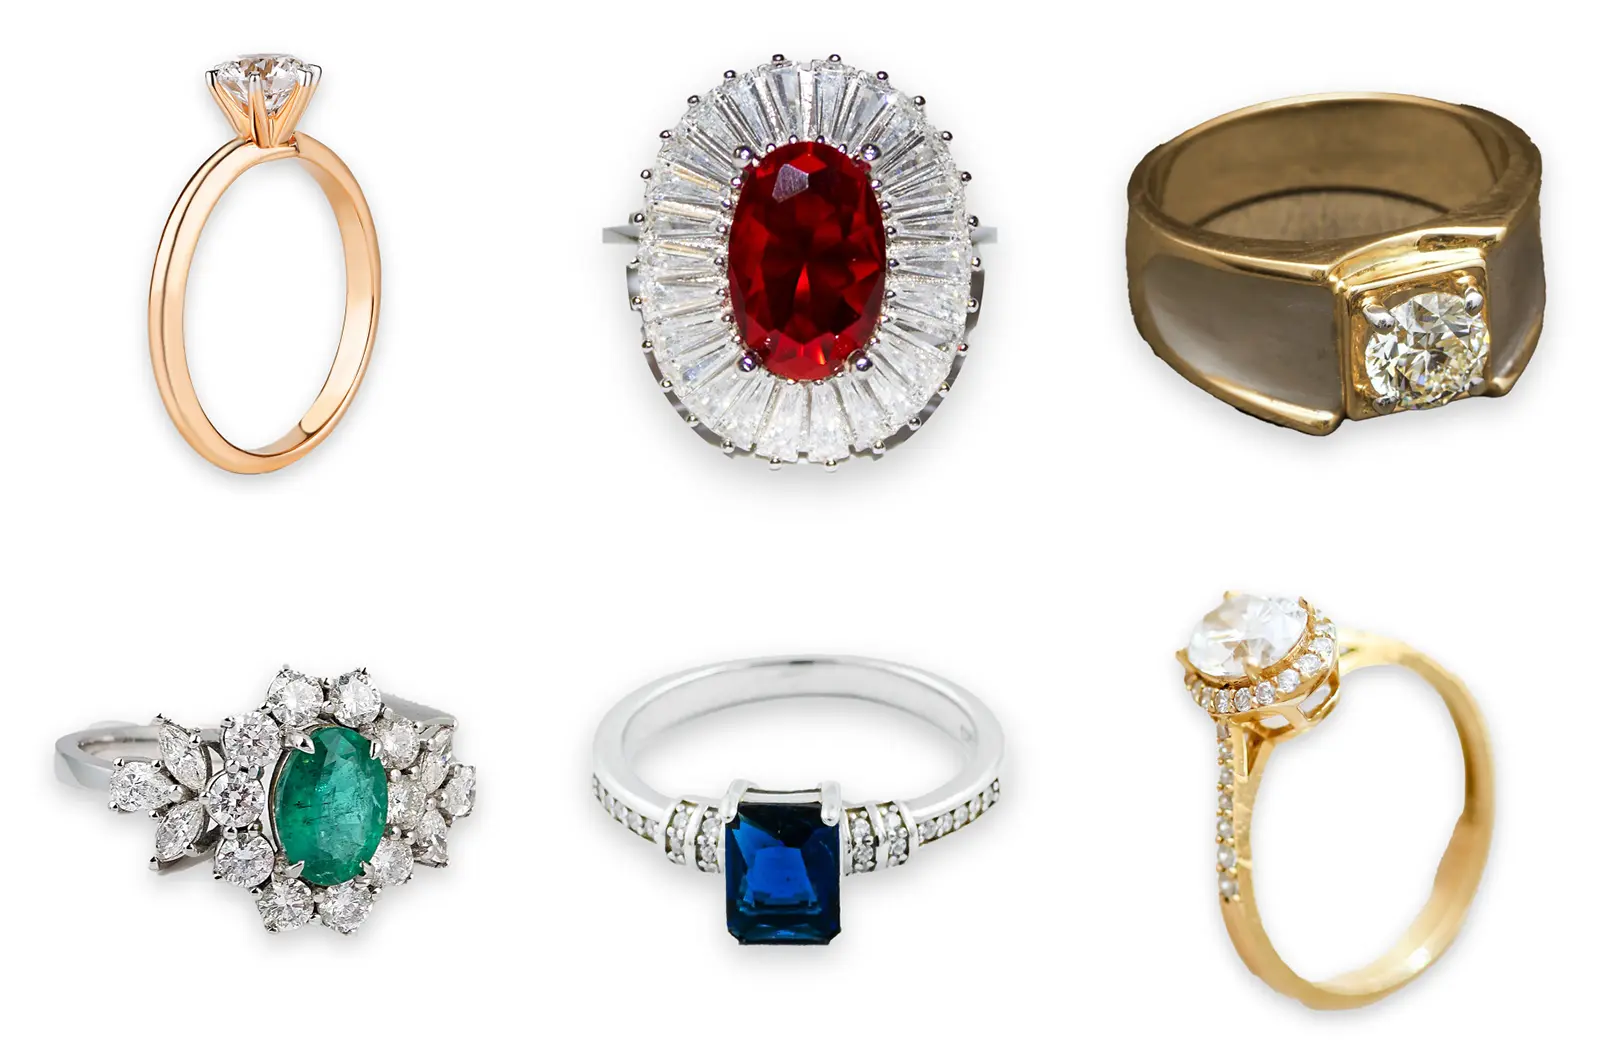
Many jewelry catalogs are built one shoot at a time, so the photos rarely match. To show how we fix that, we took six ring photos by six different photographers and edited them in Photoshop to one spec. All six now share a white background, one crop and one shadow, and their metal tones are matched.
Sample project. No client is behind this page. The six source photos are from Pexels and are credited below. The brief, the spec, the editing and every number on this page are ours. We add client case studies when clients agree to be named.
Client
Year
Industry
Executive summary .
A collection page shows every ring at once, so a shopper notices straight away when the photos don’t match. Our six source photos had six different backgrounds: light grey, blue-grey, terracotta, a grey studio set, cool white and warm cream. The light, angle and framing changed from photo to photo, and so did the color of the metal.
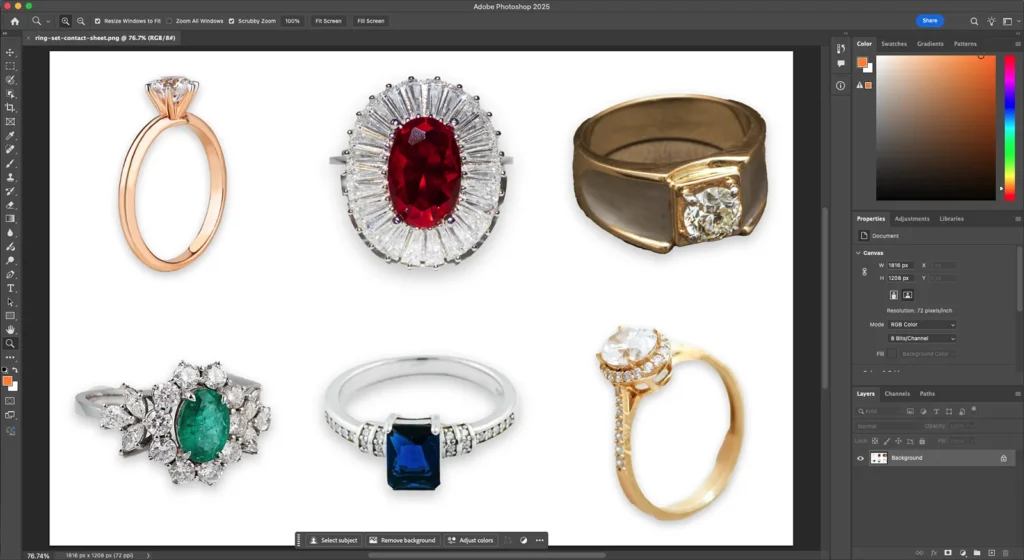
After editing, all six sit on pure white with the same framing and the same soft shadow. The two yellow-gold rings now match each other and the white gold reads neutral. Each stone shows only the sparkle it had in the original photo.
The Clipp Out Line solution .
We cut each ring out with Photoshop’s Select Subject and then checked the mask at 100% magnification. Three of the six masks needed correcting by hand. That is normal for jewelry: polished metal reflects whatever is behind it, and the software reads those reflections as background.
We set the spec on one reference ring first and wrote it down. The other five rings were edited to the same values. Every adjustment sits on its own layer in the PSD, so any of them can be changed later without redoing the cut-out.
Each ring was photographed well. Side by side, the six photos looked like six different stores.
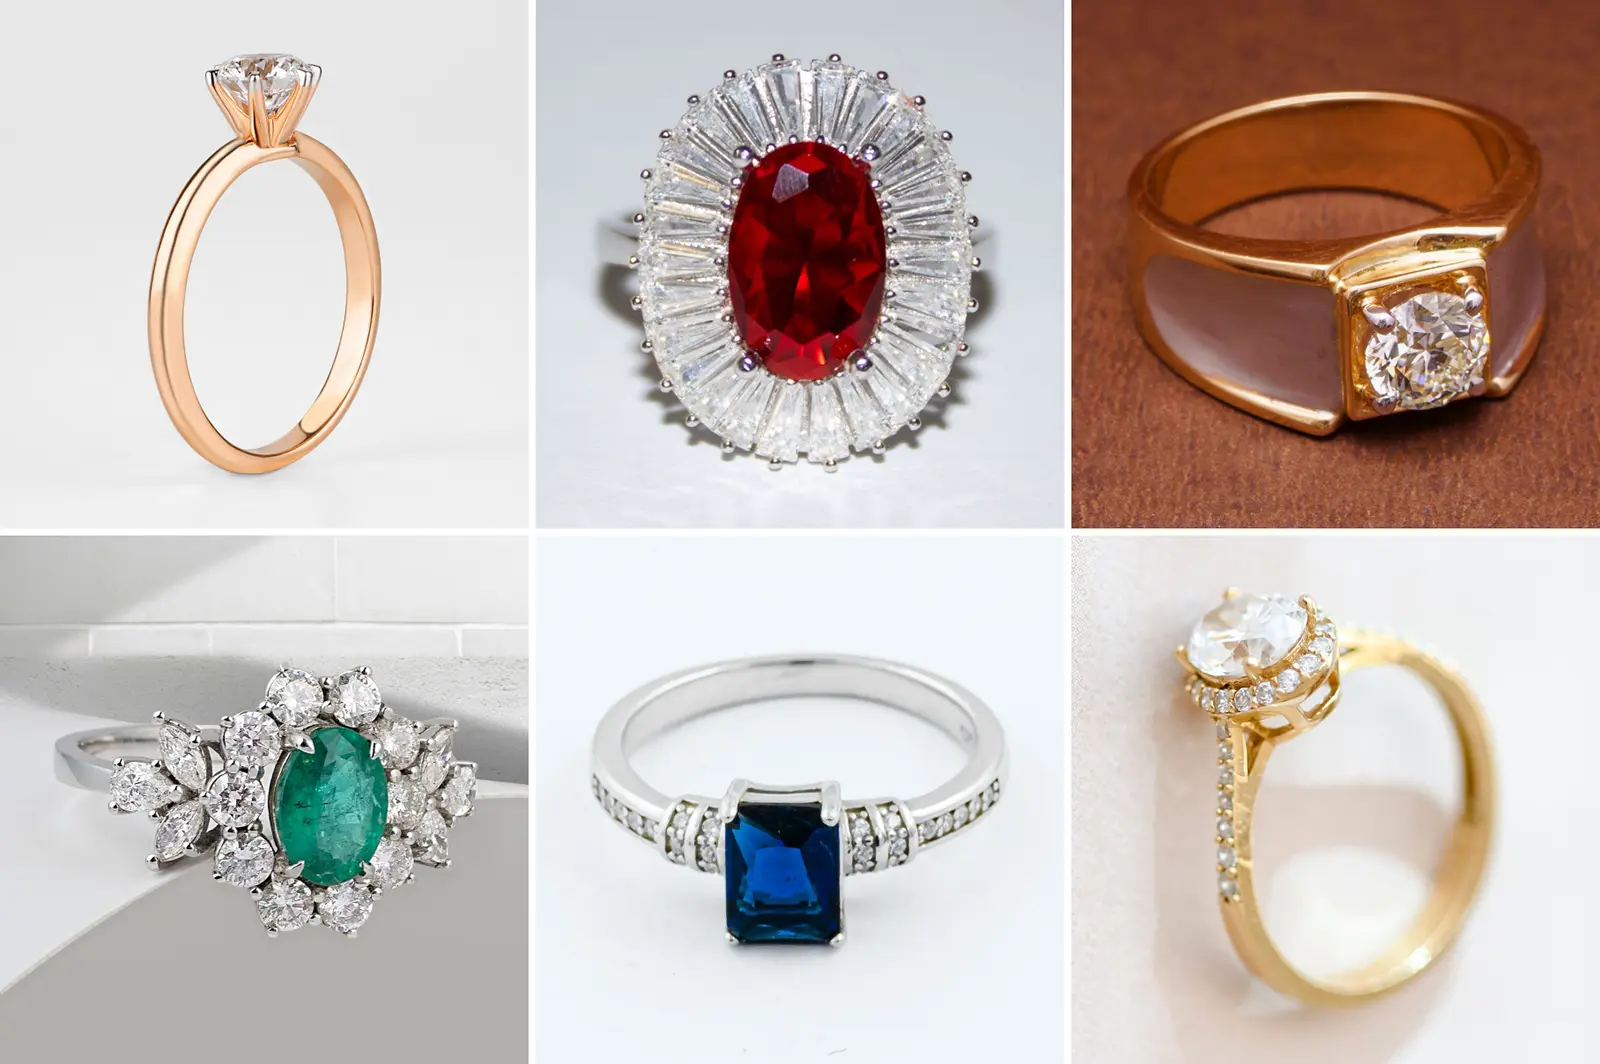
Three problems that decide how a ring is judged.
Six backgrounds, one look
A category page only looks curated when its photos agree with each other. When the backgrounds and crops don’t match, the products look like they came from different places.
- Challenge
Every photo had a different surface behind the ring, and each ring sat at a different size in the frame. On the ruby ring, the white-gold shank was nearly the same grey as the background.
- Solution
Each ring went onto pure white at the same scale, with a soft shadow built from its own outline. On the ruby ring we traced the shank by hand and removed the original grey shadow that the mask had kept.
Gold that reads as gold
Buyers judge karat and finish from the color of the metal. Gold that takes on the color of its backdrop looks like a different metal.
- Challenge
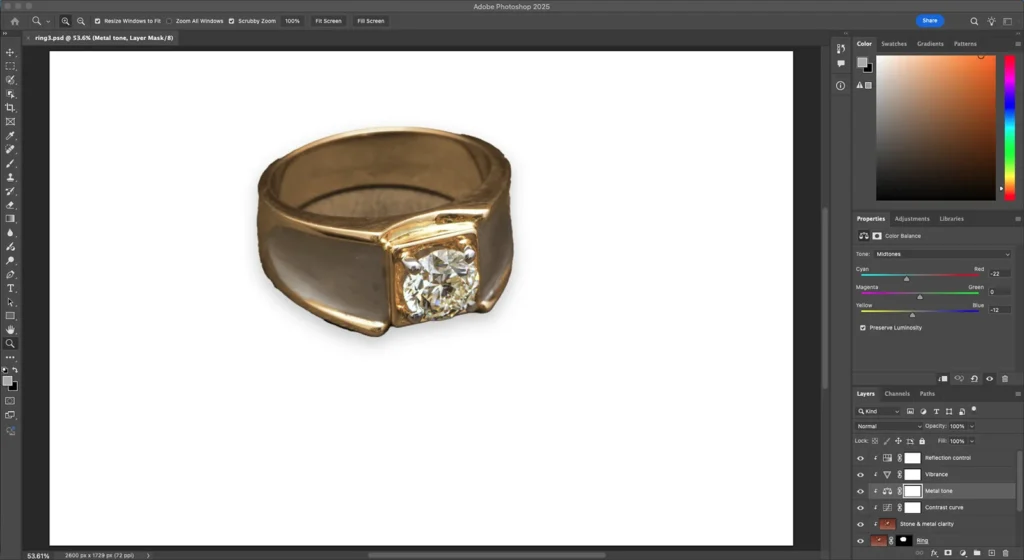
The yellow-gold ring was shot on terracotta. Its polished side faces mirrored the brown backdrop, and the whole ring came out orange next to the other yellow-gold ring.
- Solution
A Color Balance layer (midtones Cyan/Red −22, Yellow/Blue −12) brought the gold in line with the other yellow-gold ring. A Hue/Saturation layer limited to the red-brown range neutralized the reflections and left the gold alone.
Stones that look like the stone
A gemstone that looks flat can lose the sale. One with painted-on sparkle can come back as a return when the real ring arrives.
- Challenge
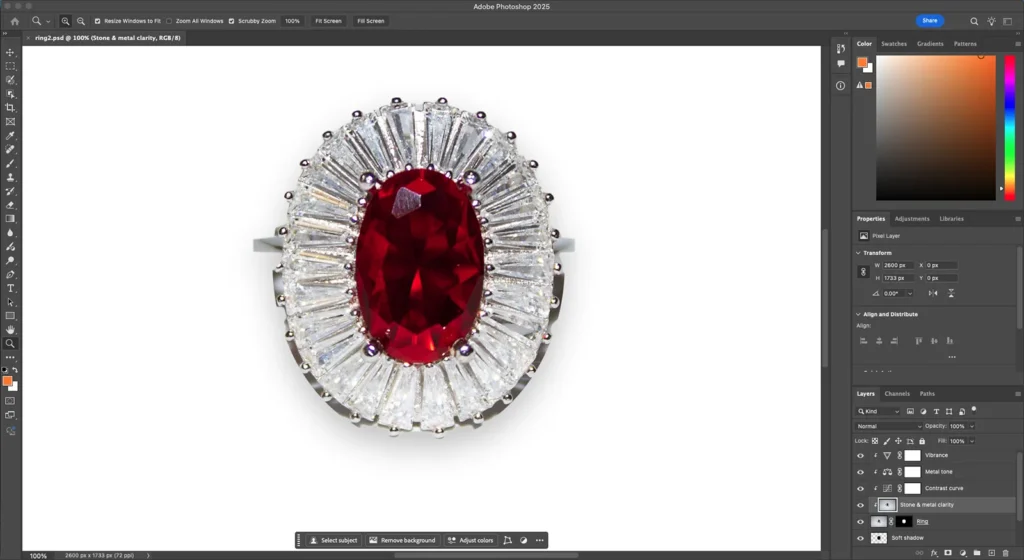
Some stones looked soft under flat light, and a red fiber of lint sat on the ruby ring’s halo.
- Solution
We sharpened the facets each stone already had (Unsharp Mask, 1.2 px radius) and removed the lint. We didn’t add any sparkle or starburst.
One reference ring, then the set.
A brand that keeps adding rings needs a repeatable system, so the next ring it shoots lands in the same place as these six.
So we started with the spec. We edited the rose-gold solitaire first, because it had the cleanest light, and wrote down the values that worked. The other five rings were edited to the same sheet.
| Spec sheet: ring set | Value |
|---|---|
| Background | Pure white RGB 255 / 255 / 255 layer under the ring |
| Cut-out | Select Subject plus a layer mask, corrected by hand where it failed |
| Framing | Square crop, ring centered, its longer side at 80% of the frame |
| Shadow | Built from the ring's own outline: 28 px blur, 24 px drop, 22% opacity |
| Contrast | Curves: 64 → 58, 192 → 200 |
| Clarity | Unsharp Mask 50 to 60%, radius 1.2 px, threshold 2 |
| Metal | One Color Balance layer per ring; yellow gold matched to yellow gold, white gold kept neutral |
| Stones | No added sparkle or starburst |
| Files | Layered PSD kept; web images exported as WebP |
Written from the reference ring, the rose-gold solitaire, and applied to all six rings.
Four passes on every ring.
Every ring went through the same four passes. Each screenshot is from this project’s Photoshop files.
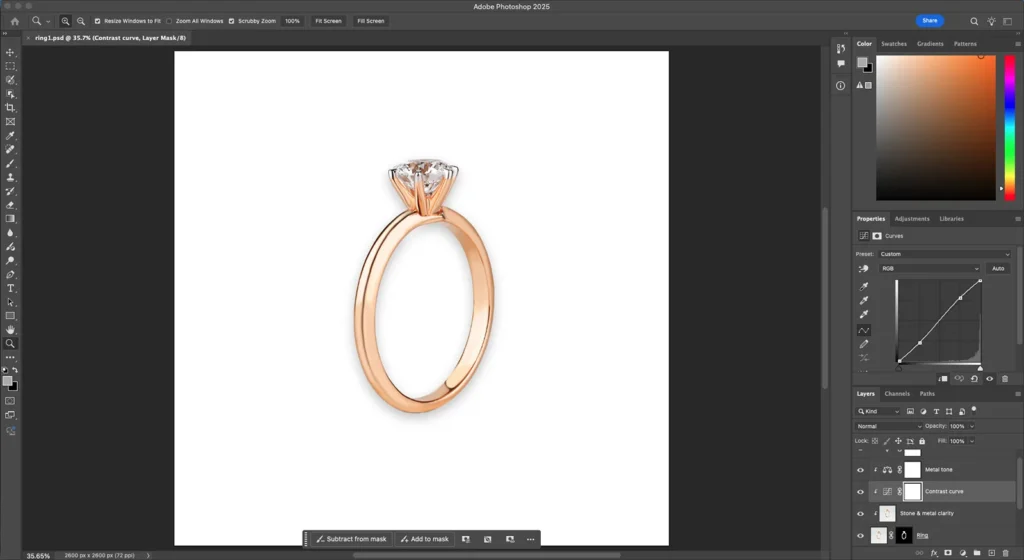
Locked the spec
Set the reference ring’s background, framing, shadow and contrast curve, and recorded each value on the spec sheet.
Matched the metal
Clipped a Color Balance layer to the gold ring to pull the orange cast out of the metal.
Brought out the stones
Added a sharpened clarity layer clipped to the ring, then checked the ruby and its halo of baguettes at 100%.
Checked it as a set
Viewed all six rings together on one contact sheet to compare scale, shadow and metal color before export.
About this project. Edited in Adobe Photoshop 2025 and reviewed by Sunil Barman, Lead Editor. Every change is non-destructive and kept as a named layer in each ring’s PSD, so the before and after on this page come from the same file. Published 12 November 2026.
Clipp Out Line has retouched product photos since 2010, and more than 60 of our in-house editors work on jewelry. Read about the studio.
The source photos are used under the Pexels license, which allows free use and modification:
Sunil Barman
Lead Editor, Clipp Out Line · Reviewed this project
The work, measured.
The spec carries over to new shoots: the next ring photographed for this set can be edited to the same values without any new decisions.
Rings edited, masks fixed and flaws removed are counts from this sample project’s files. First-pass approval is our studio-wide figure for jewelry work, as published on the service page. Because there is no client, this page has no client-reported results.
6
Rings edited
From 6 different photographers
3 of 6
Masks fixed by hand
Select Subject missed metal or kept a shadow
2
Flaws removed
Lint on the ruby halo; brown reflections on the gold
98.6%
First-pass approval
Studio-wide, jewelry
The difference, up close.
Three of the six rings. Each before is the Pexels original, cropped square, and each after is our edit at the same crop. Drag to compare.
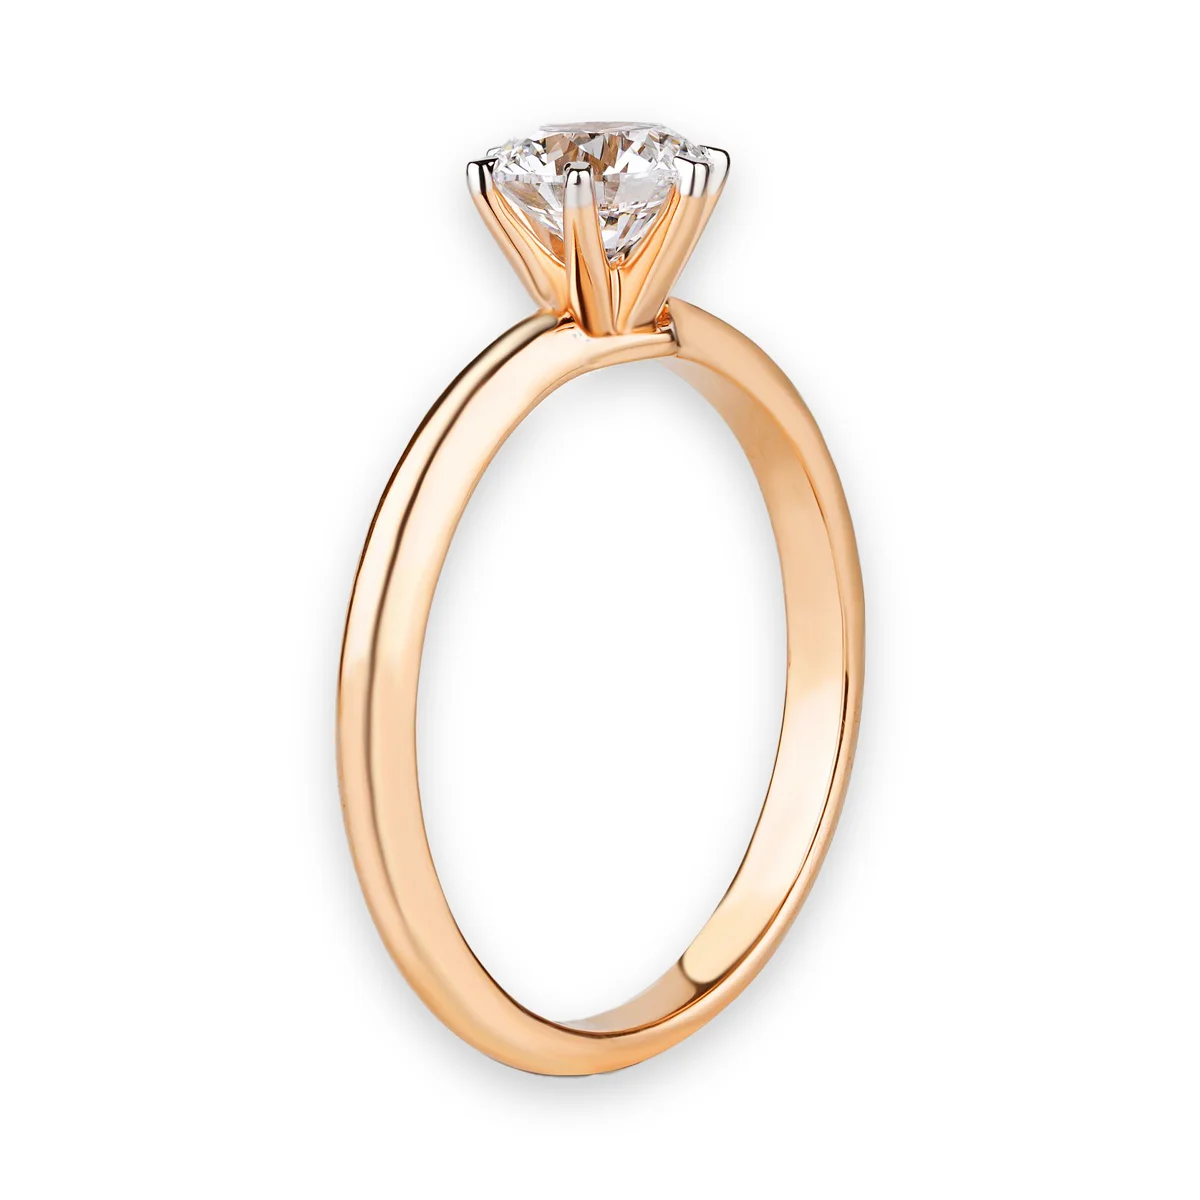
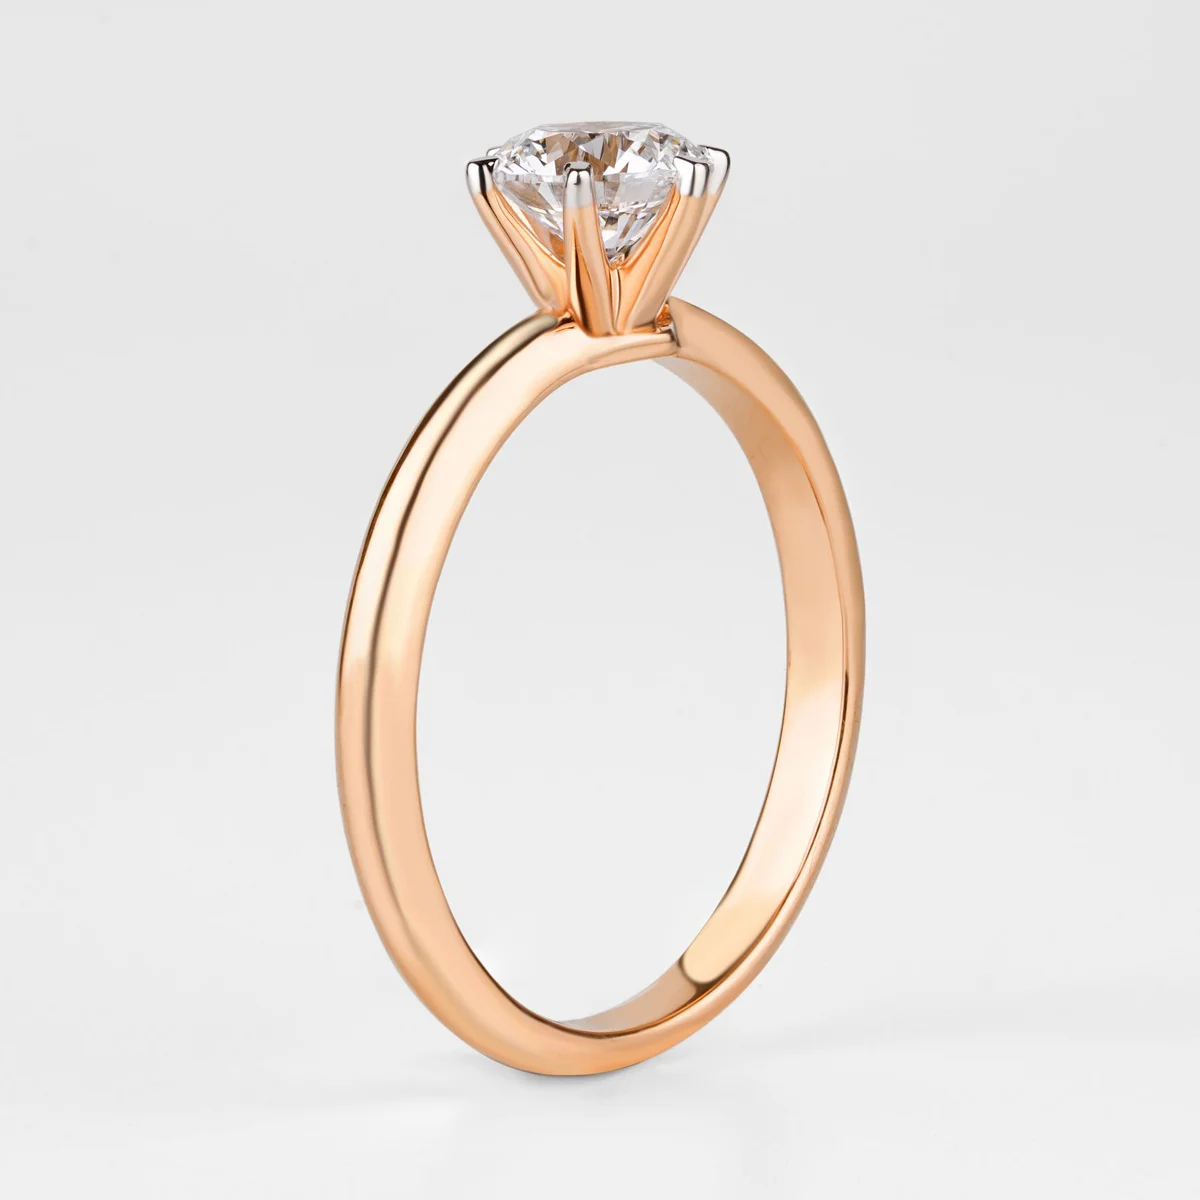
Rose-gold solitaire · contrast and clarity
Pexels photo: The Glorious Studio
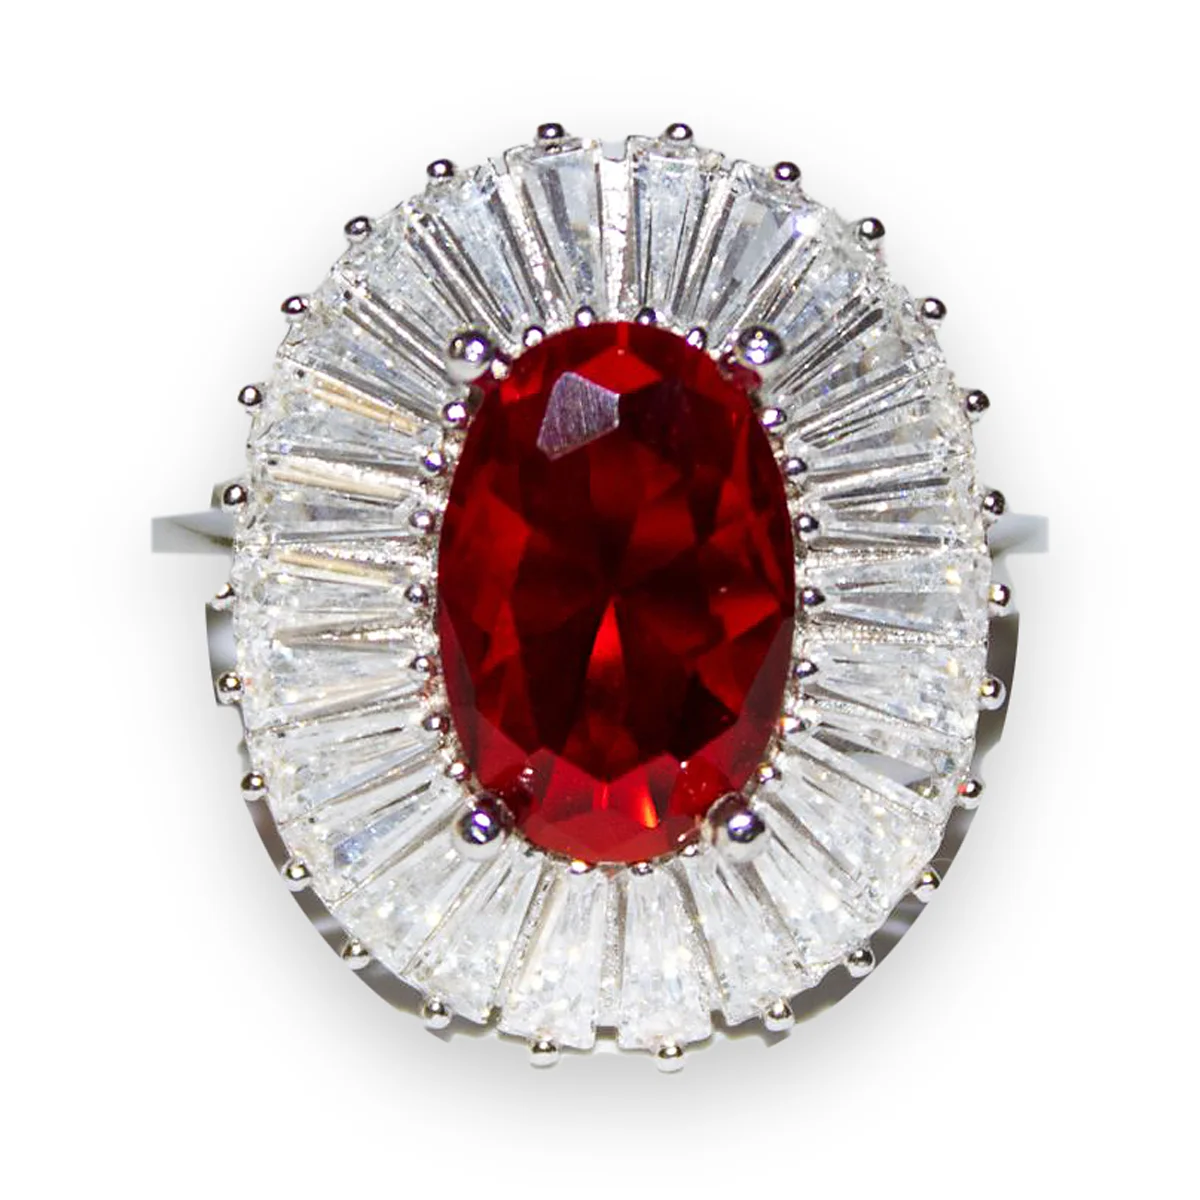
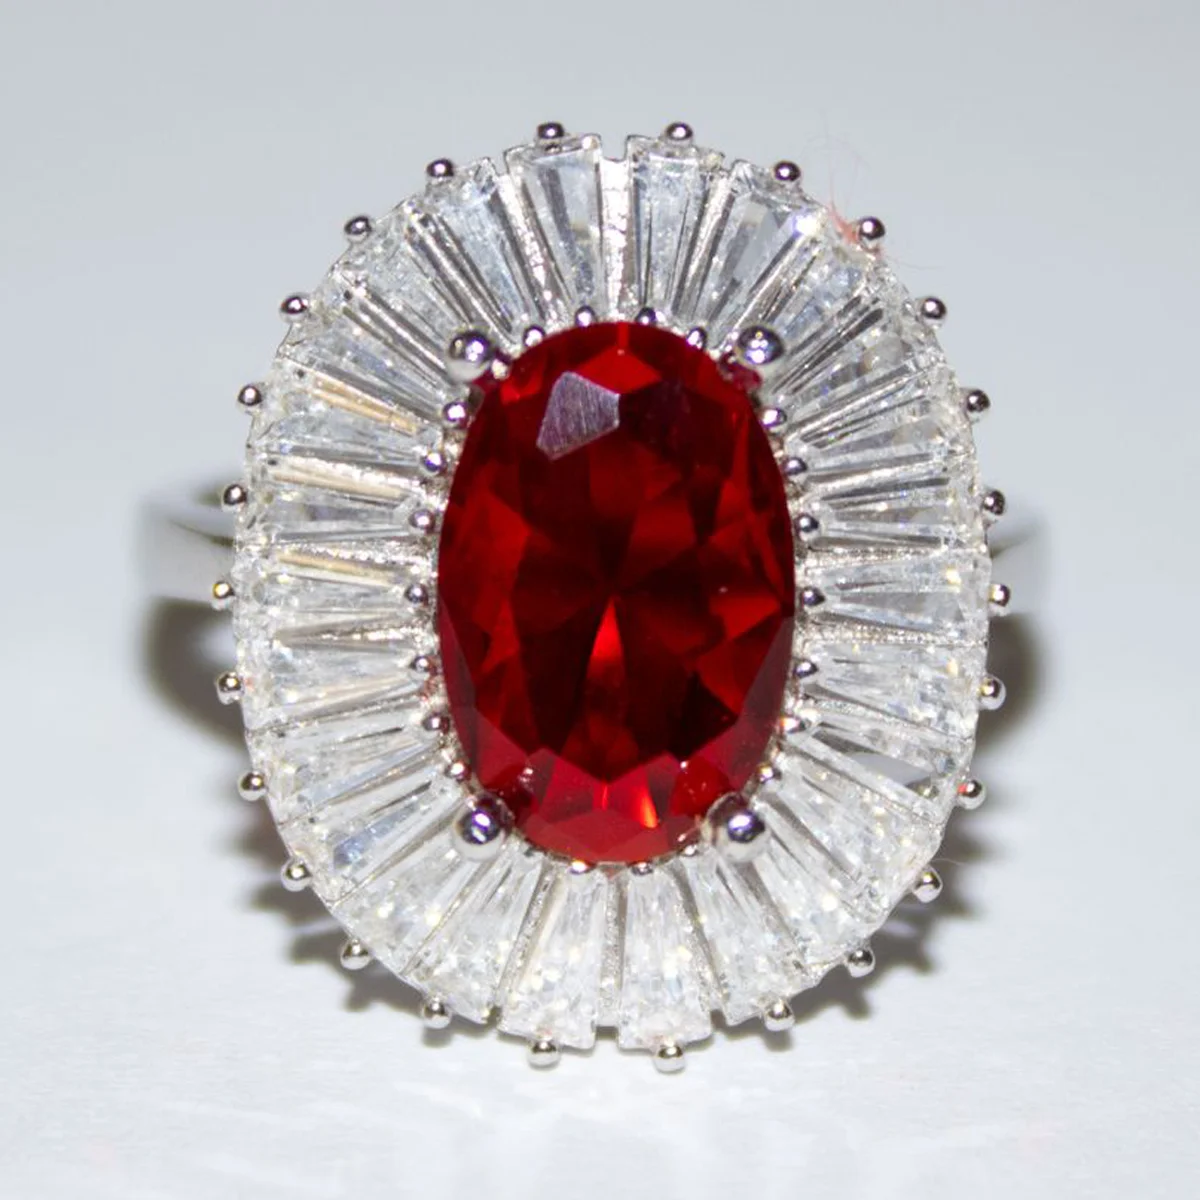
White-gold ruby halo · shank and lint repair
Pexels photo: Semih Başaran
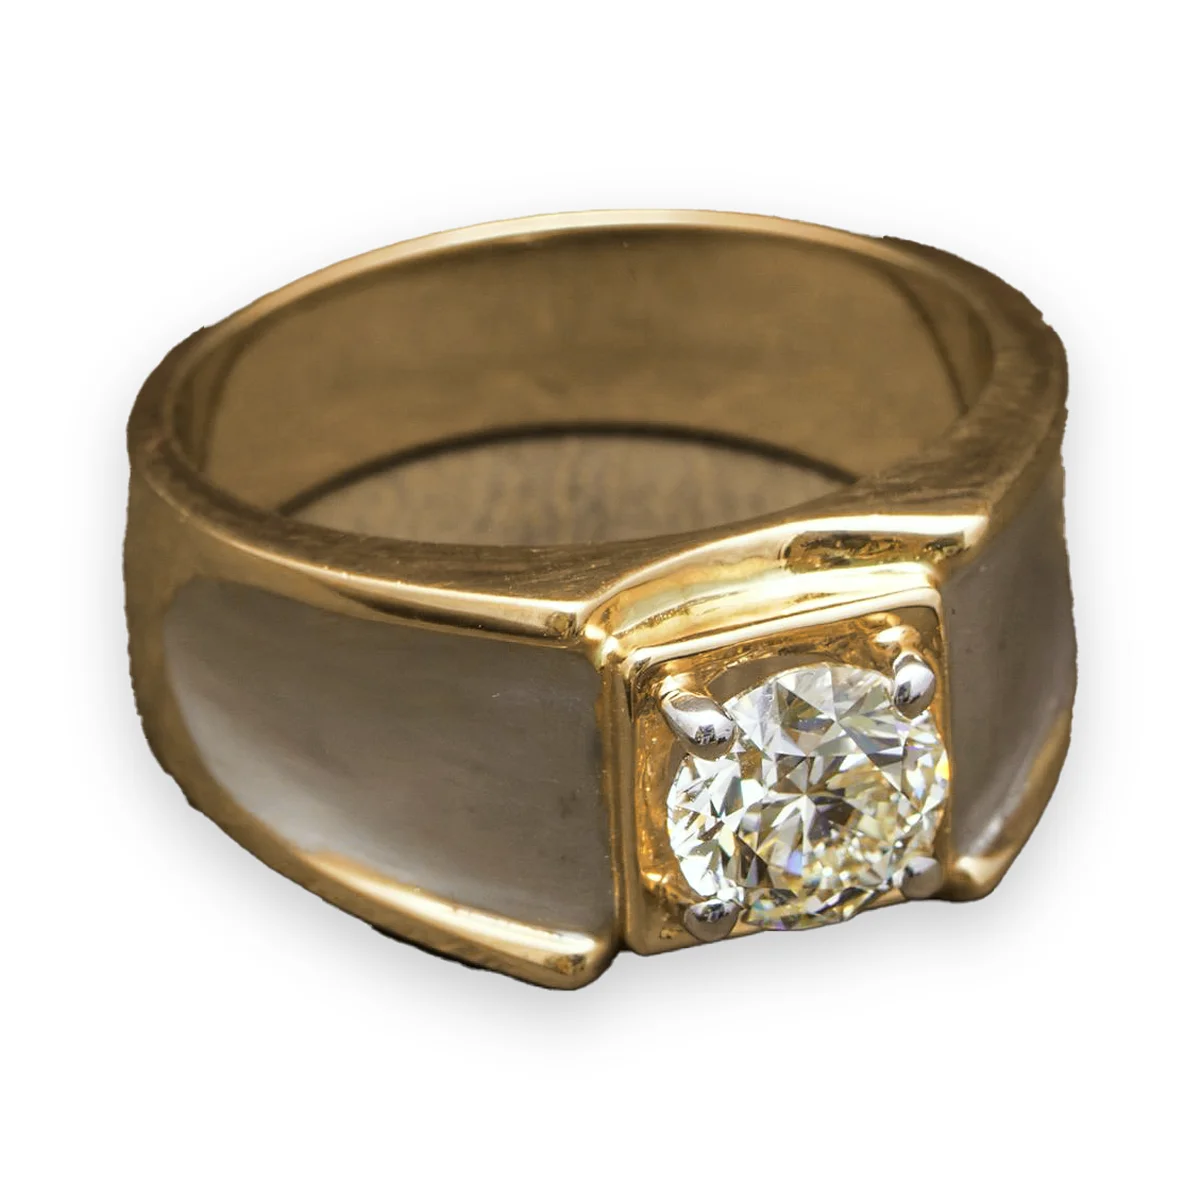
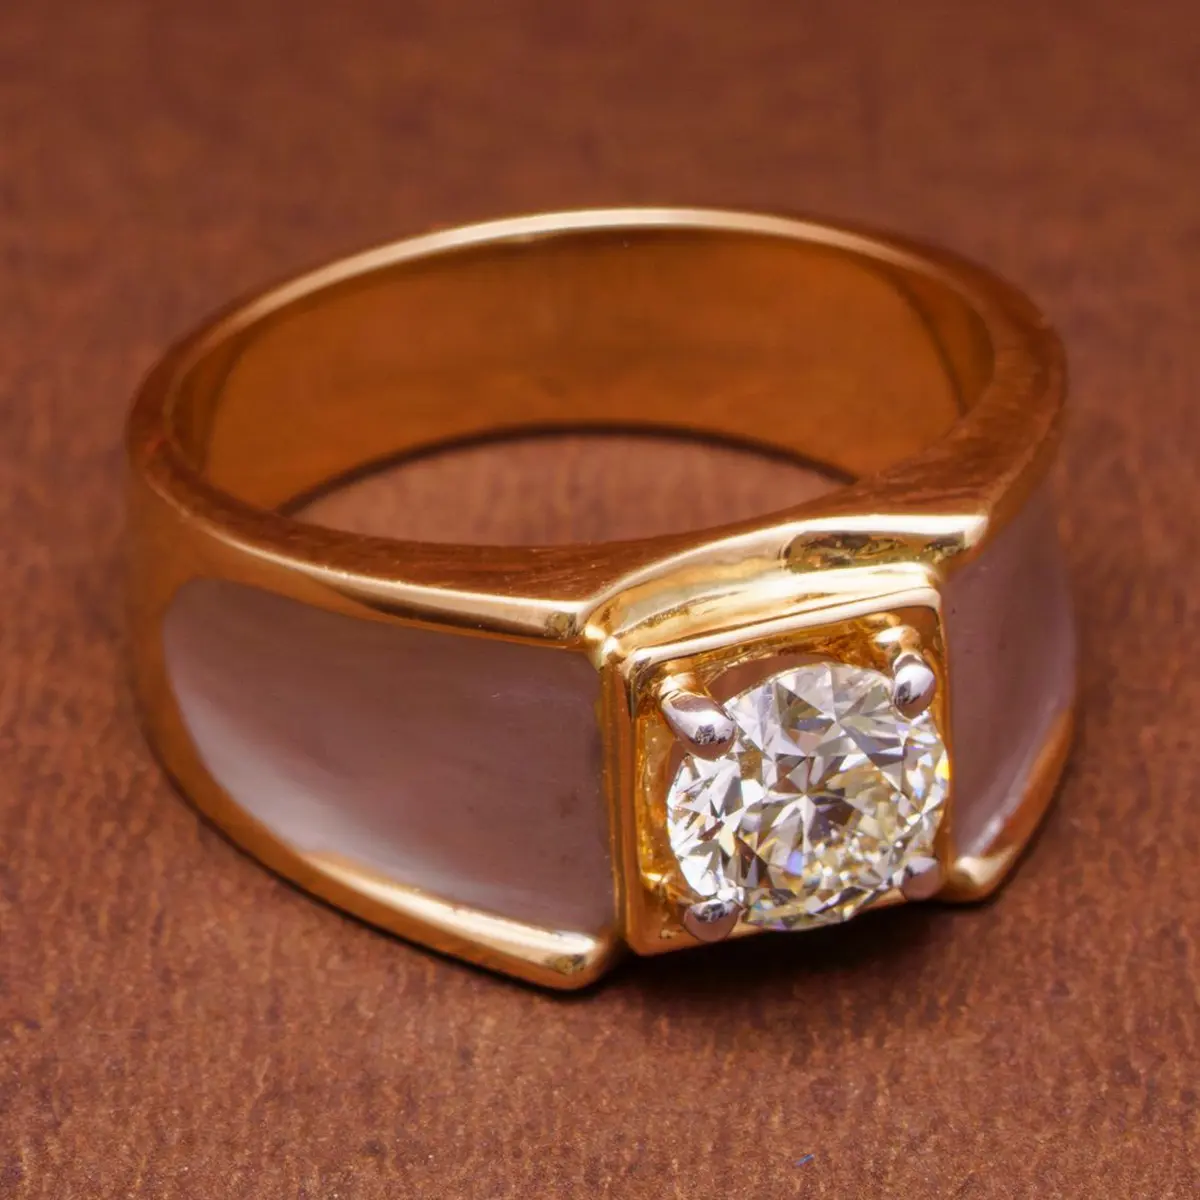
Yellow-gold ring · metal tone and reflection control
Pexels photo: Kunal Lakhotia

Does your collection match itself?
Send us 3 of your ring photos and we’ll edit them free, with no card needed, matched to your spec. Then judge the result on your own pieces.