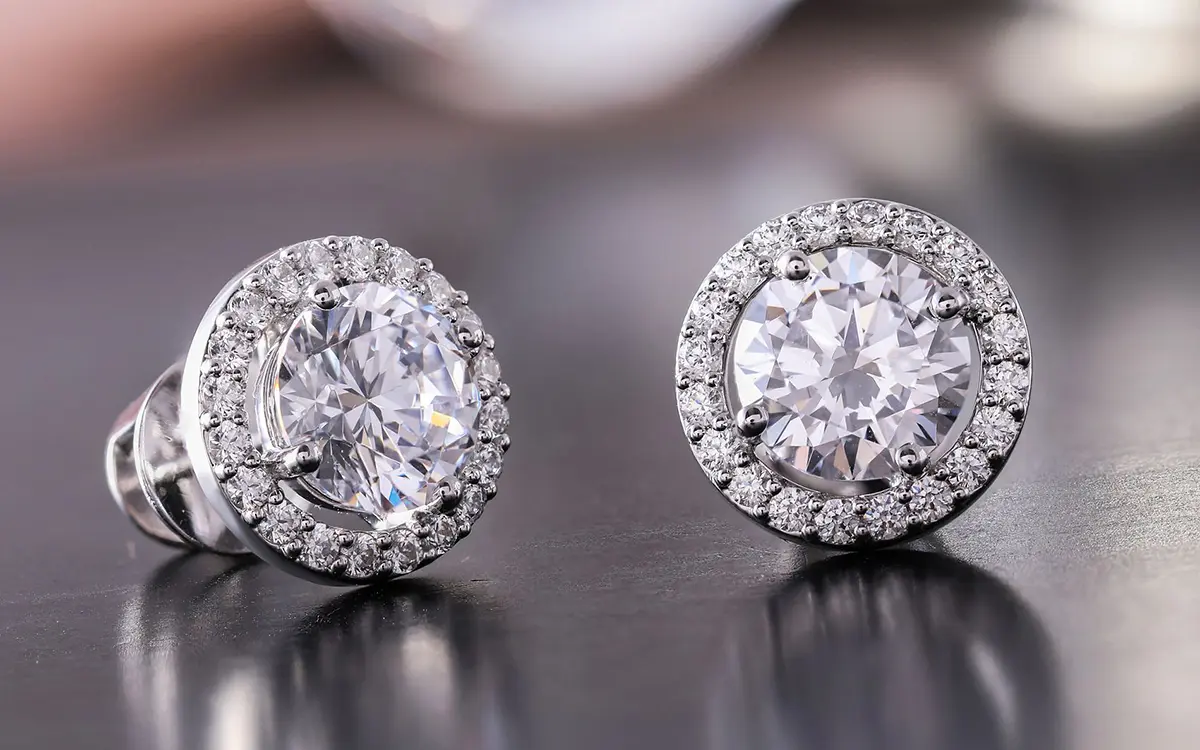
Earring photography is jewelry photography with one extra rule: there are two pieces, and buyers compare them. A good set shows the pair matched, the back and the finding, and one shot on the ear for size.
Quick answer:
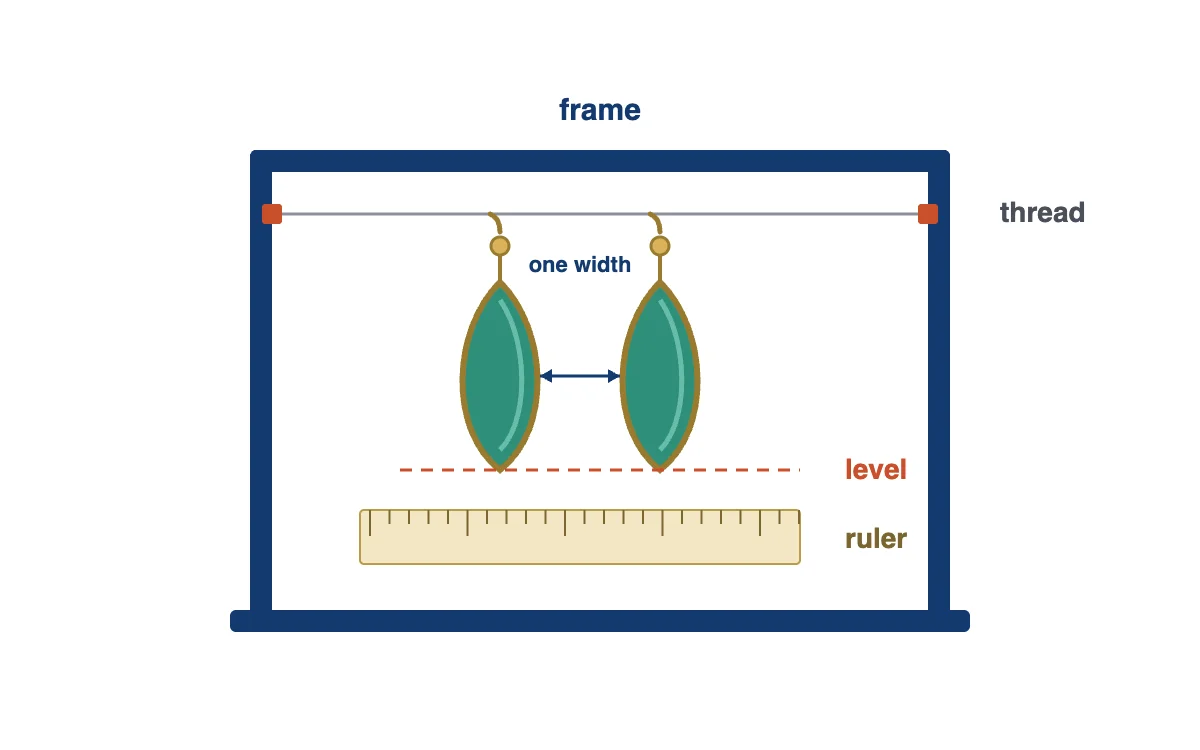
- Hang or stand both earrings at the same height, a gap of about one earring width apart.
- Keep the pair in one plane, square to the lens, so both stay sharp.
- Shoot six frames: pair on white, three-quarter, profile, back and finding, on the ear, detail.
- Never clone one earring to make the pair: the buyer receives both.
The lens, light and focus stacking behind every shot here are in our full guide to photographing jewelry. This post covers what changes when the piece comes in twos, with the time each shot takes and what it costs in editing.
What earring photography covers
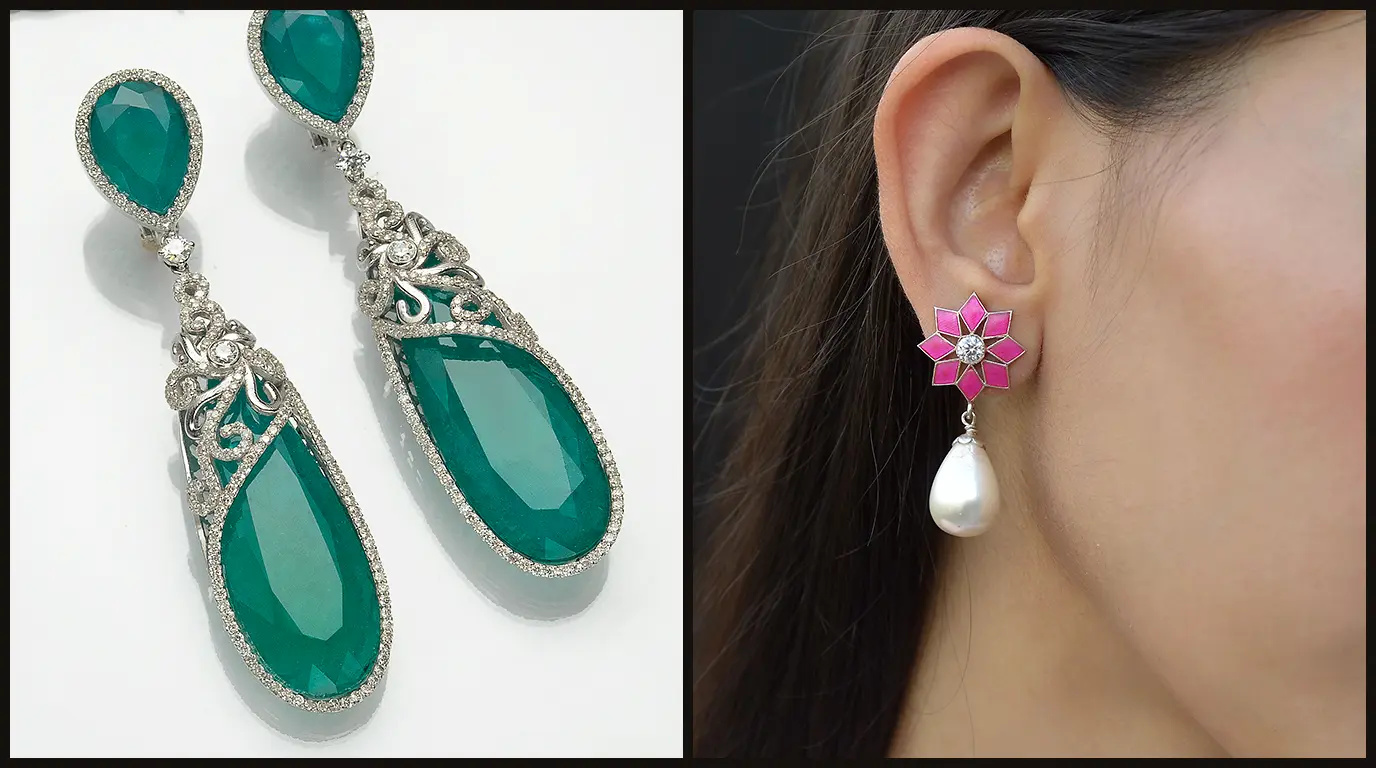
Earring photography is the set of images a buyer needs to judge a pair before paying: what the earrings look like together, how they hang, how they fasten and how big they are on a real ear. Most of the work is in making two pieces look like what they are, a matched pair.
A complete earring set covers:
- The pair together on white, for the main listing image
- Angles that show depth: a three-quarter view and a profile
- The back, with the finding: hook, post, lever-back or clip
- One worn shot for scale, and one close-up of the stone or texture
A pair must also be shown as it is. Two handmade earrings are never identical, and a buyer who receives a slightly different second earring than the photo showed has a reason to return both.
Why earrings are harder to photograph than other jewelry
Earrings double every problem. Two pieces have to sit at the same height, turn to the same angle and catch the same light, or the photo reads as a mismatched pair even when the earrings match. They are also small, they swing, and the part buyers check most, the finding, sits behind the piece.
The cost shows up after the sale. A buyer who can’t tell the drop length or whether the hooks are sterling silver asks a question, chooses a listing that shows it, or buys and sends the pair back.
What you need before you start
Earrings need a way to hold two pieces still at the same height. Everything else is the same kit you use for any product shot.
| What | Why it matters | Minimum |
|---|---|---|
| Open frame with clear thread | Hangs drops and hoops so they fall naturally | A small wire or wood frame, 0.2 mm clear nylon thread, two clips |
| Two-hole acrylic stand or foam core | Holds studs upright as a pair | Clear acrylic, or white foam core you push the posts through |
| Ruler or straightedge | Sets both earrings at the same height | A clear 15 cm ruler |
| Museum putty and tweezers | Turns each earring to the same angle without fingerprints | Clear putty, fine-tip tweezers |
| Gray card | Keeps metal tone true on both pieces | An 18% gray card |
| A model or ear form | Shows size and how the earring hangs | A volunteer, or a display ear form |
Some faults can’t be fixed after the shoot. An earring that swung during the exposure is soft for good, and a pair shot at two different distances from the lens can’t be made the same size without redrawing one. Thread, putty, hook shadows and dust are different: they are what jewelry photo retouching cleans up once the file lands.
The FTC’s Guides for the Jewelry, Precious Metals, and Pewter Industries and the UK’s CAP Code both judge an image by whether it misleads the buyer. A cloned second earring fails that test, and so does a finding retouched to look like a different metal.
The 6 shots every pair of earrings needs
Allow 40 to 70 minutes for the first pair through all six shots. Most of that is setting the pair; later pairs of the same style go much faster because the frame and the light stay put.
Step 1: Set the pair at the same height and spacing (5–10 min)
Every later shot depends on the two earrings starting level.
- Stretch the clear thread across the frame and pull it tight, so it can’t sag between the hooks.
- Hang both earrings on the same thread, with a gap of about one earring width between them.
- Hold a ruler under the pair and check that the bottoms line up within about 1 mm.
- For studs, push both posts through the acrylic stand or foam core at the same height, backs on.
In editing: the thread is removed, and the gap between the pieces is left as shot.
Step 2: Shoot the pair on white, square to the lens (10–15 min)
This is the main image, and the one most marketplaces show in search.
- Put the camera level with the earrings and square to them, so both sit in one plane and stay sharp at the same aperture.
- Use the settings from the full guide, f/11 to f/16 and ISO 100, and frame the pair at 70 to 85% of the width.
- Wait until both earrings stop swinging, then shoot with a 2-second timer.
- Shoot one frame with the gray card beside the pair, then one without.
In editing: the background goes to pure white, dust comes off, and both pieces are matched to the gray card.
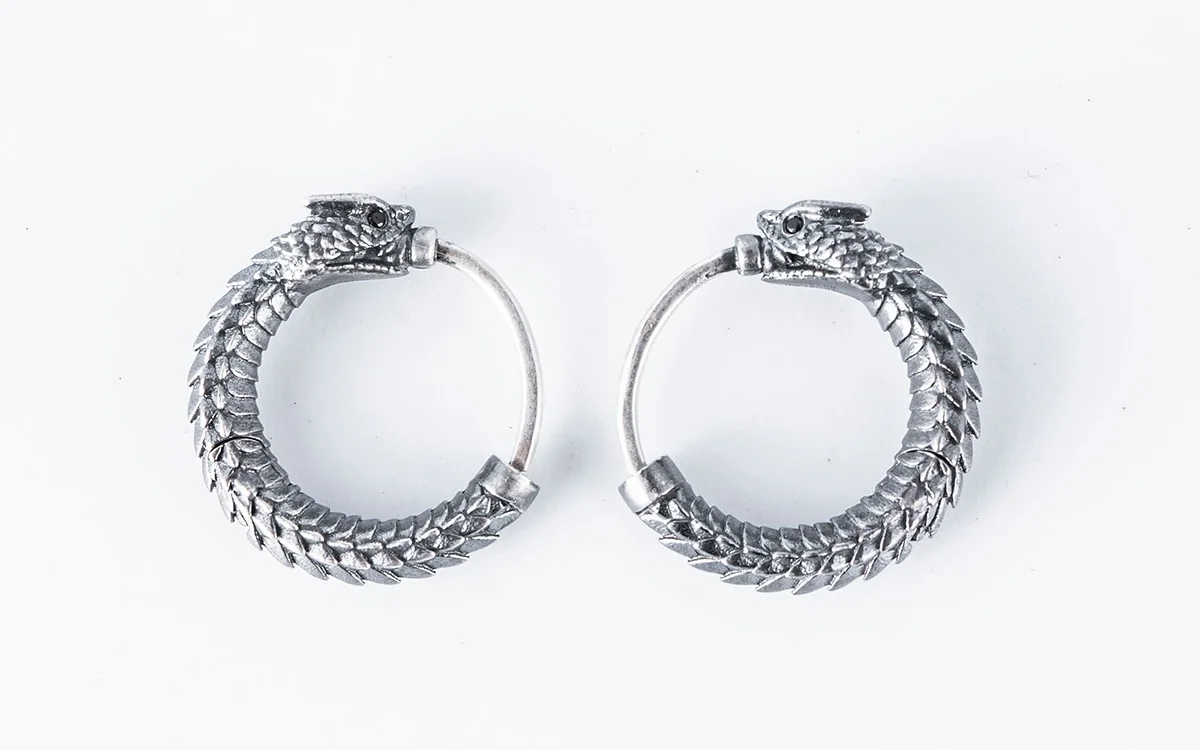
Step 3: Add a three-quarter view and a profile (5–10 min)
A straight-on shot hides how deep a drop is or how thick a hoop is.
- Turn both earrings about 30° to the same side, using tweezers on the hook, not your fingers on the stone.
- For the profile, turn them a full 90° so the camera sees the side of the setting.
- Focus-stack if the front and back of the piece don’t both hold focus: a turned pair is no longer in one plane.
In editing: the two pieces are checked for the same angle, and stray reflections of the frame are cleaned.
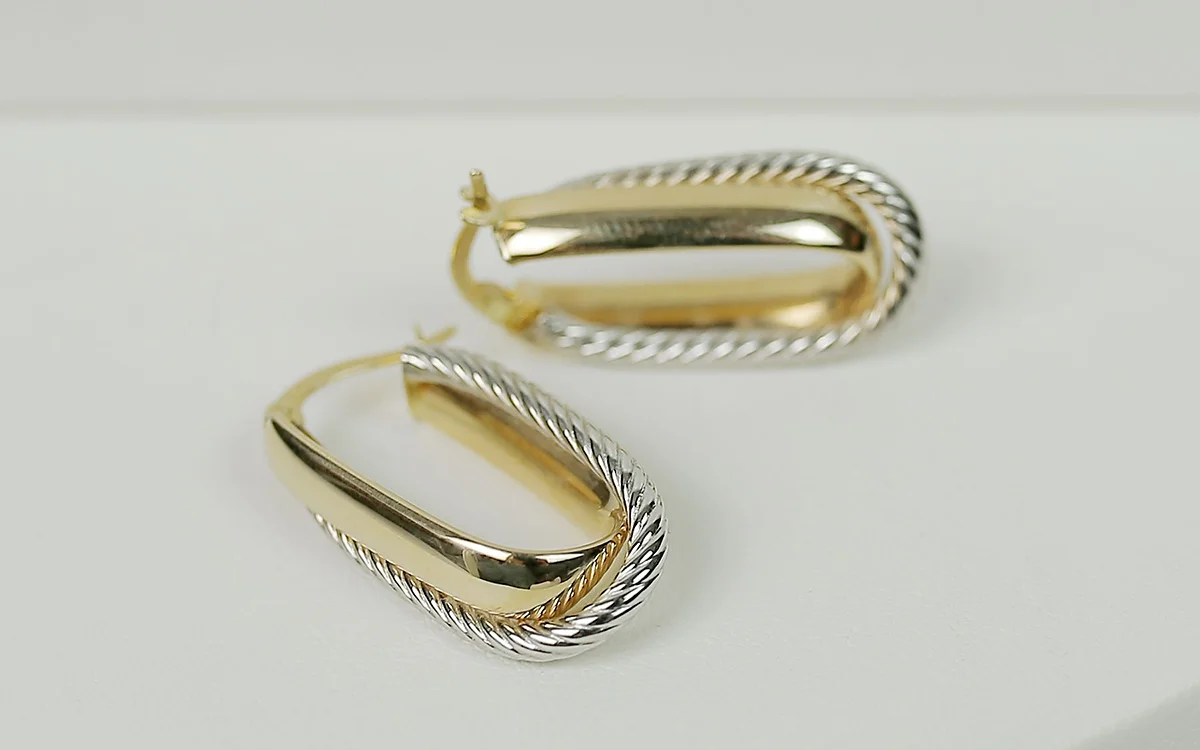
Step 4: Shoot the back and the finding (5–10 min)
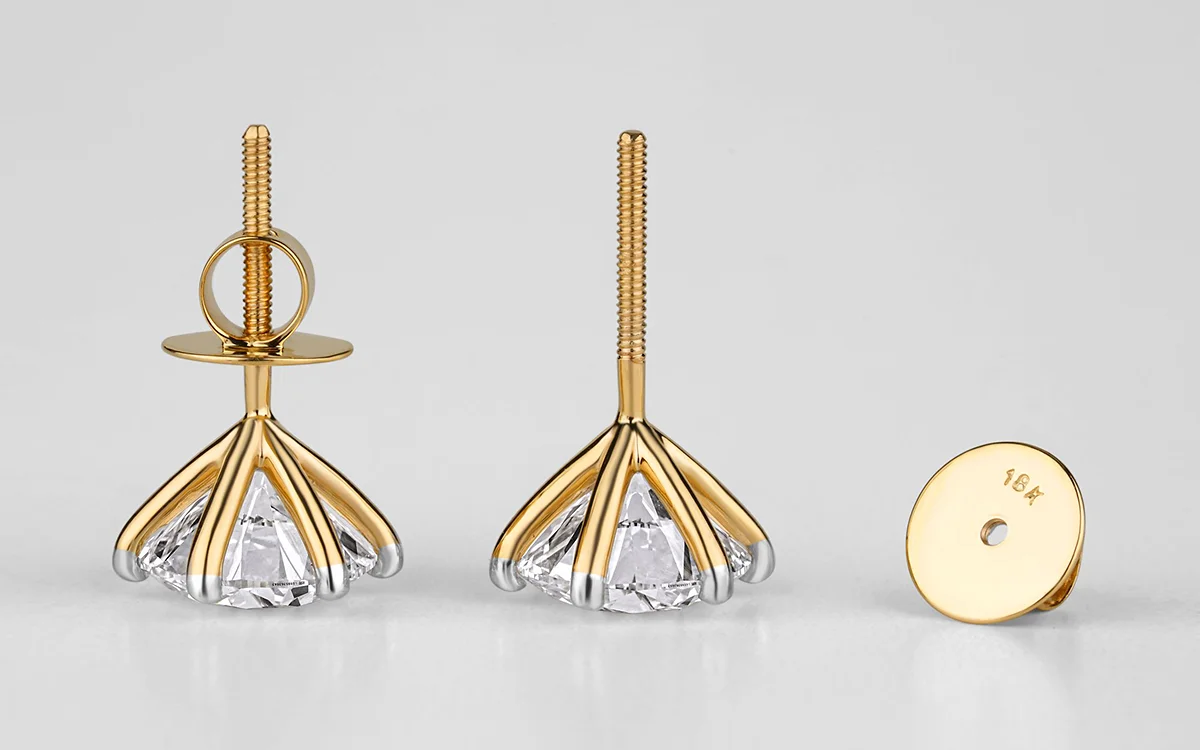
Buyers with sensitive ears often check the finding first: what metal it is and how it fastens.
- Turn the pair around, or lay one earring face down on white.
- Frame the hook, post, lever-back or clip so its shape and any metal stamp are readable.
- For studs, shoot the back off and on, so the buyer sees the post length and the back style.
In editing: the finding is cleaned, but its metal and shape are left exactly as they are.
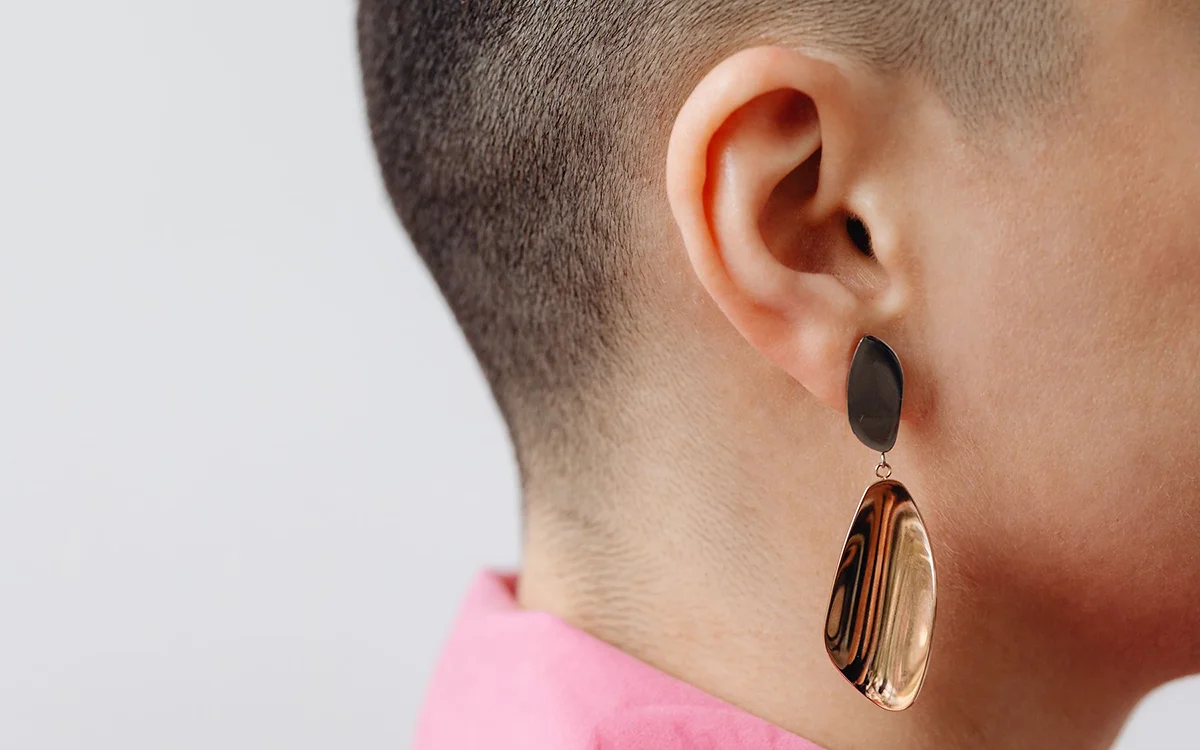
Step 5: Shoot one earring on the ear (10–15 min)
A worn shot shows the size, and for drops, how far the earring falls below the lobe.
- Pull the hair back and shoot from the side, at ear height, with soft window light or a diffused light from the front.
- Keep the gray card in the first frame: skin and yellow gold sit close in hue.
- Shoot both a close crop of the ear and a wider frame that shows the jawline, so drops show their length against the neck.
In editing: skin and stray hairs are cleaned, and the metal tone is checked against the gray card.
Step 6: Add a close-up of the stone or texture (5–10 min)
The detail shot shows what a buyer can’t see at thumbnail size.
- Move in on one earring until the stone, enamel or hammered texture fills most of the frame.
- Light from about 45° through diffusion so facets show edges instead of one white glare.
- Check the frame at 100% for dust before you move on.
In editing: dust and fine scratches are removed, and the stone’s color is kept as shot.
Studs, drops, hoops and huggies: what changes
The six shots stay the same for every style. How you hold the pair, and what usually goes wrong, depends on the type.
| Type | How to hold the pair | Watch for |
|---|---|---|
| Studs | Posts through a two-hole stand or foam core, backs on | Studs turning on the post, so the two stones face different ways |
| Drops and dangles | Hung on one taut thread | Swing during the exposure, and uneven drop length from a sagging thread |
| Hoops | Hung on thread, or stood on putty for a profile | Hoops that look oval because they are turned slightly off square |
| Huggies and ear cuffs | Stood on putty, closed as worn | The hinge hidden in every frame; give it its own detail shot |
Necklaces have the same hanging problem in a longer form. Our guide on how to photograph a necklace covers chains, drape and the clasp.
Common mistakes
Most rejected earring photos fail on the pair: two pieces at different heights, turned to different angles, or shot while one was still moving. These six cause most of the retakes and retouching time we see.
| Mistake | What it looks like | Fix |
|---|---|---|
| Earrings at different heights | One drop looks longer than the other | Level both against a ruler before shooting |
| Pair turned to different angles | One stone catches light, the other looks dark | Turn both with tweezers, then check from the camera position |
| Sagging thread | The pair tilts toward the middle | Pull the thread tight and clip both ends |
| Shooting while they swing | Soft edges that can’t be sharpened | Wait, and use a 2-second timer |
| No back or on-ear shot | Buyers ask about the finding or the size | Add Steps 4 and 5 to every listing |
| One earring cloned to make the pair | A photo that doesn’t match what ships | Shoot both, and let retouching even the light, not the pieces |
Shoot it yourself, or outsource the finish?
Shooting your own earrings makes sense for most small shops. The frame, the thread and an afternoon of practice are enough for clean pairs, and a few new designs a month may never need outside help.
| Doing it yourself works when | Outsourcing works when |
|---|---|
| You list a few new pairs a month | A collection launches with dozens of pairs |
| Most of your earrings are studs on white | Many are drops, hoops or stones that need matching |
| One person shoots every listing | Several shooters’ files have to look the same |
| The images go to your own shop | A marketplace launch date is fixed |
The editing is what grows with volume. Matching a pair, removing thread and hook shadows, and cleaning both pieces takes 15 to 40 minutes per image. Six shots of twenty pairs is 30 to 80 hours. For the capture side of every shot, the jewelry photography guide has the full method.
At that volume, a professional jewelry retoucher gives those hours back. Our studio has retouched jewelry by hand since 2010, with more than 60 retouchers on jewelry alone. Every image gets a second check at 100% zoom, and full-resolution files come back, most within 24 hours.
To see the finish on your own pairs, send us your trial images. It’s free, with no card or sign-up.
Frequently asked questions
Start with the pair on white, then add a three-quarter view, a profile, the back with the finding, one shot on the ear and a close-up of the stone. For social posts, hang the pair over a textured card or shoot it on a model in window light.
Yes. The main image should show the pair, level and at the same angle, because that is what the buyer receives. Single-earring shots work for the close-up and the on-ear frame.
Hang them on a taut clear thread, wait until they stop swinging, and shoot with a 2-second timer. Studs and huggies stay put on a two-hole stand, foam core or a little clear putty.
List the six shots for each pair, group the pairs by style so the holder doesn’t change between them, and book the on-ear shots last, when the light and settings are fixed. Allow 40 to 70 minutes for the first pair.
A retoucher can even the light, the tone and the background so a real pair reads as a pair. Changing the shape or size of one earring to match the other misrepresents the product, so we don’t do it.