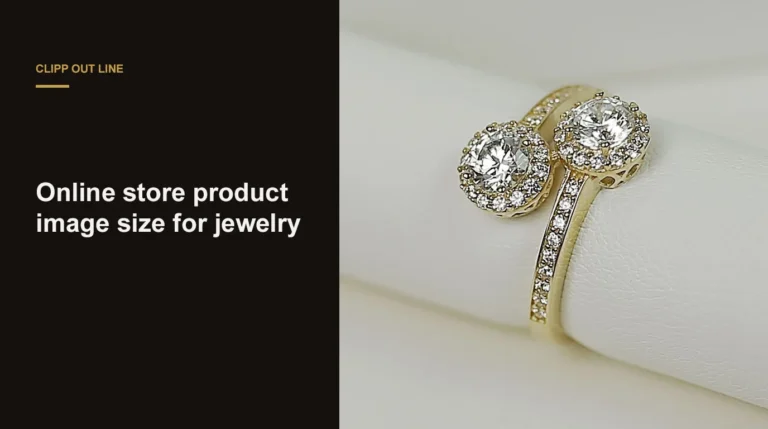
The best jewelry photography background for a listing is matte white or light gray, because it keeps metal and stone color true. Black suits polished silver and diamonds in hero and social images, and textured surfaces belong in lifestyle shots.
Quick answer:
- Listings and marketplaces: a matte white or light gray sweep.
- Diamonds, white gold and silver hero shots: black velvet or a black-to-white gradient.
- Social and lifestyle posts: slate, linen, wood or stone, chosen to suit the metal.
- A white sweep shoots light gray. Pure white comes in editing.
- Polished metal reflects the background, so pick it before the shoot.
Our complete jewelry photography method covers the lens, light and focus behind every setup here. This post covers the choice it leaves open: what goes behind and under the piece, and what each option costs in editing.
What a jewelry photography background does
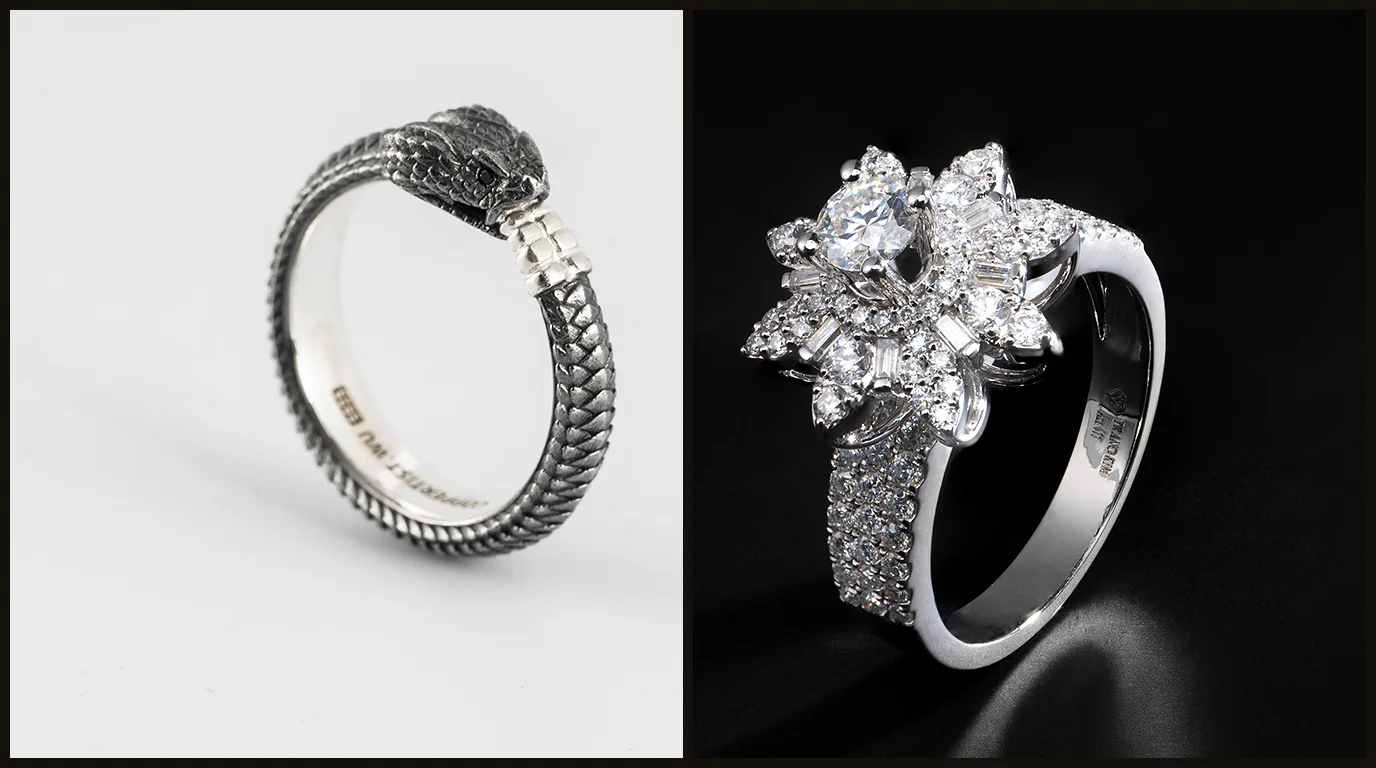
A jewelry photography background is everything the camera and the piece can see around it: the surface under the piece, the sweep behind it and the cards around it. Polished metal and faceted stones reflect it, so on jewelry it shows up inside the piece as well as behind it.
Choosing a background for jewelry pictures means choosing three things: the surface, matte or glossy; the color behind the piece; and what the metal will reflect.
A background must never change how the piece looks. A blue backdrop that tints white gold, or a warm one that makes silver look like gold, shows the buyer a product they won’t receive.
Why the background matters more for jewelry than for other products
A shoe on white looks like a shoe on white. A polished ring on white reflects white, so its bright edges vanish and the band reads gray. Change the background and the metal’s tone and the contrast in the stones change with it.
The best background for jewelry photography, by channel and metal
The best background for jewelry photography depends on two things: where the image will be shown and what the piece is made of. Start with the channel, because it sets the rules, then adjust for the metal and stone.
| Where the image goes | Background | Why |
|---|---|---|
| Marketplace main image (Amazon, Google Shopping) | White sweep, cleaned to pure white in editing | Main images are judged against a white page; Amazon requires it |
| Etsy and Shopify listings | White or light gray, the same for the whole collection | A grid of matching backgrounds reads as one brand |
| Website hero and campaign images | Black, dark gray or a gradient | Dark backgrounds give polished metal and diamonds contrast |
| Instagram, Pinterest and lifestyle | Slate, linen, wood, stone or skin | Texture tells a story a white sweep can’t |
Amazon’s exact main-image rule has its own guide in Amazon image requirements for jewelry. Within each channel, the metal and stone decide the rest.
| Piece | Works best on | Avoid |
|---|---|---|
| Yellow and rose gold | White, light gray, warm slate | Blue or green backgrounds, which reflect into the metal and muddy it |
| Silver, white gold and platinum | Light gray, or black for contrast | Pure white with no black cards: the edges disappear |
| Diamonds and clear stones | Black or a dark gradient for hero shots, white for listings | Bright colored surfaces that show up as color inside the facets |
| Colored gemstones | White or neutral gray | Backgrounds near the stone’s color, which flatten it, or its opposite, which shifts it |
| Pearls | Soft white or light gray | Black for dark pearls, which lose their outline |
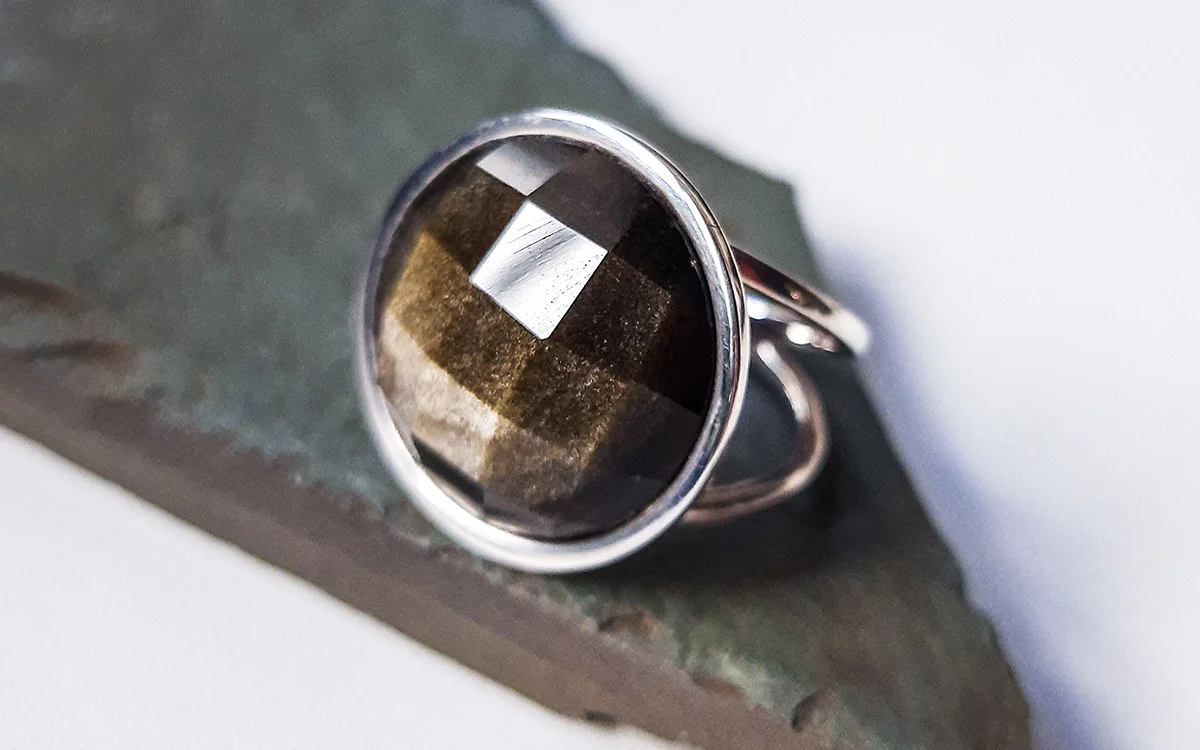
| Oxidized, hammered and handmade pieces | Natural textures: slate, wood, linen | Glossy acrylic that competes with the texture |
White or black: the two backgrounds most shops use
Jewelry photography white background
White is the default because every marketplace accepts it and it shows the piece’s true color. Its catch is exposure. A white sweep lit to the same level as the piece photographs as light gray. Push the exposure until the sweep turns pure white, and the highlights on polished metal blow out along with the sparkle in the stones.
Light the background separately instead, about one stop brighter than the piece. It then reads close to white while the metal keeps its detail. The last step to pure white, with a clean edge around the piece, is a job for jewelry photo editing, which can do it without touching the metal.
Jewelry photography black background
Black gives polished metal and diamonds the dark reflections they need to show edges and fire, which is why it is the usual hero background. It is also unforgiving: on black velvet, every fiber and speck of dust shows at 100%.
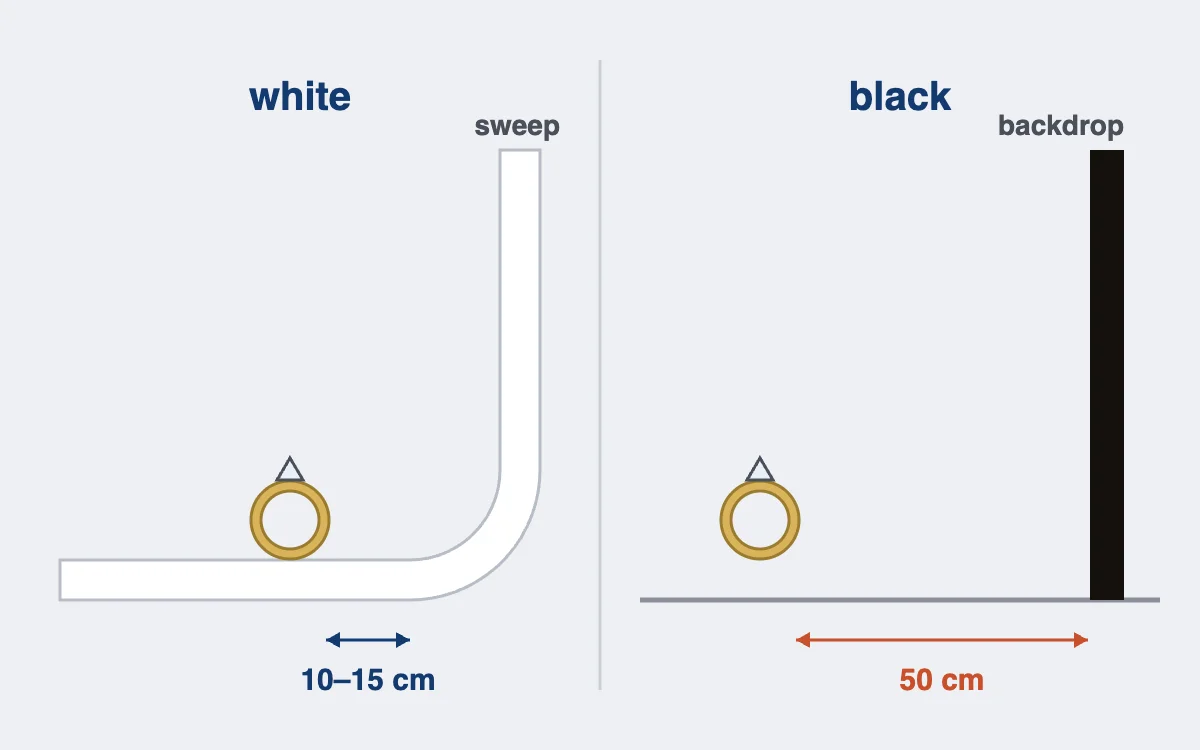
Keep light off the backdrop. Place the piece at least 50 cm in front of it and aim the light at the piece only, so the background falls to black on its own. Black acrylic gives the same depth plus a mirror reflection under the piece, but shows every scratch and fingerprint.
Backdrops for jewelry photography: what to buy
You don’t need many backdrops for jewelry photography. Most shops get every background for jewelry photography they need from a white paper sweep, a light gray card and a black backdrop, plus black and white cards to shape the metal.
| Material | Look | Best for | Watch for |
|---|---|---|---|
| Matte paper sweep, white or light gray | One smooth curve, no horizon line | Listings and marketplace images | Creases and scuffs; tear off the dirty end |
| Matte card or foam board | Flat, even | Small pieces, flat lays | A visible edge if the frame is wide |
| White or black acrylic | Glossy, with a reflection under the piece | Hero shots and watches | Scratches, dust and fingerprints show |
| Black velvet | Deep, light-absorbing black | Diamonds, silver, hero images | Lint and fibers at 100% |
| Gradient paper | Dark to light behind the piece | White gold and silver, which need both tones | Banding if it is creased |
| Slate, stone, wood or linen | Natural texture | Social and lifestyle images | Warm wood tints silver; strong grain competes with fine pieces |
Some background problems can’t be fixed later. A colored surface reflected inside a polished band is now part of the metal’s tone. A background bright enough to flare into the stone has erased facet detail for good. Creases, dust, a gray sweep and a visible horizon line are different: retouching cleans those up.
The FTC’s Guides for the Jewelry, Precious Metals, and Pewter Industries and the UK’s CAP Code judge an image by whether it misleads the buyer. A cleaned background passes. Metal recolored to hide a tint the backdrop put there does not.
How to set up a jewelry photography background: 5 steps
Allow 20 to 35 minutes the first time. After that, every piece in the collection uses the same setup.
Step 1: Choose the background for the channel and the metal (2–5 min)
Decide before anything goes on the table, because the background shapes the light you’ll need.
- Check where the main image goes, using the channel table above.
- Check the metal and stone against the second table, and note any background to avoid.
Step 2: Build a sweep with no horizon line (5–10 min)
A sweep curves from the table up the wall, so there is no line behind the piece.
- Clamp the top of the paper or acrylic to a stand or a wall, about 40 to 60 cm high.
- Let it curve down onto the table without a fold, and tape the front edge flat.
- Wipe or roll the area where the piece will sit: dust on a sweep is in every frame.
Step 3: Set the distance between the piece and the backdrop (2–5 min)
Distance controls how the background looks more than its color does.
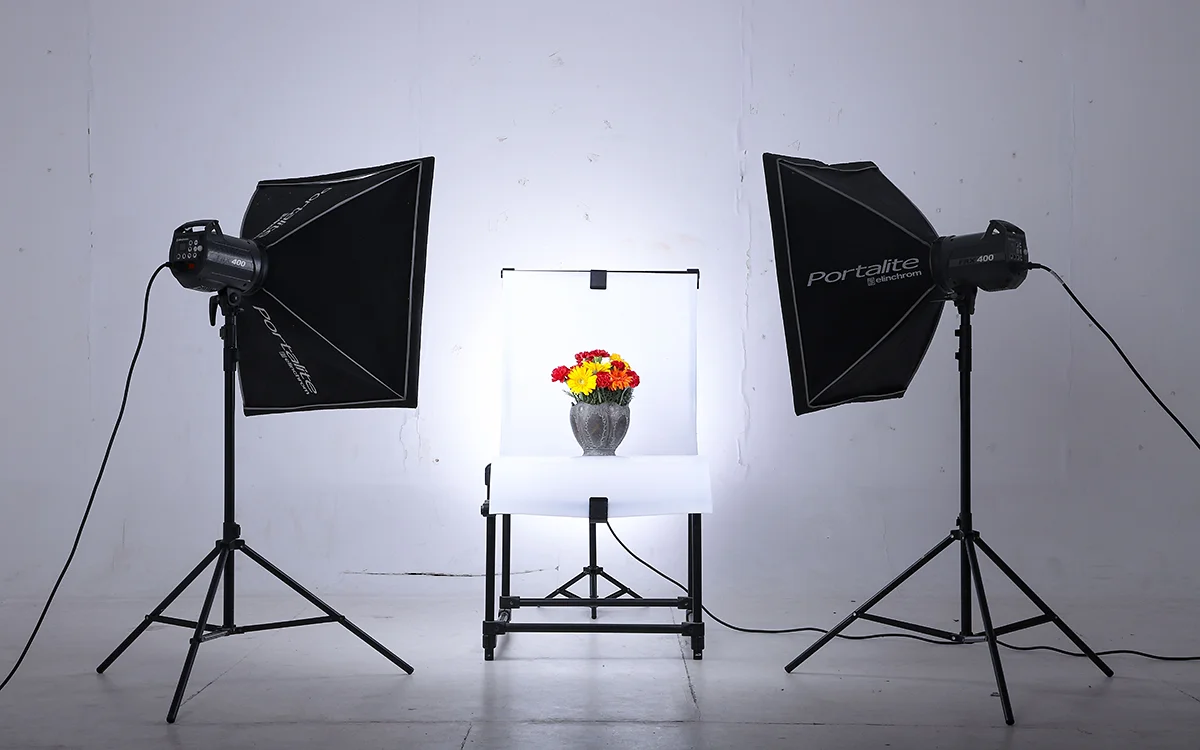
- On white, place the piece 10 to 15 cm in front of the curve, so the light falls evenly behind it.
- On black, move it at least 50 cm in front of the backdrop, so the light on the piece fades before it gets there.
- On acrylic, set the piece directly on the surface and check the reflection under it from the camera position.
Black and white cards around the piece shape the metal’s edges. Our guide to the lightbox for jewelry photography shows where they go.
Step 4: Light the background separately (5–10 min)
The piece and the background need different amounts of light.
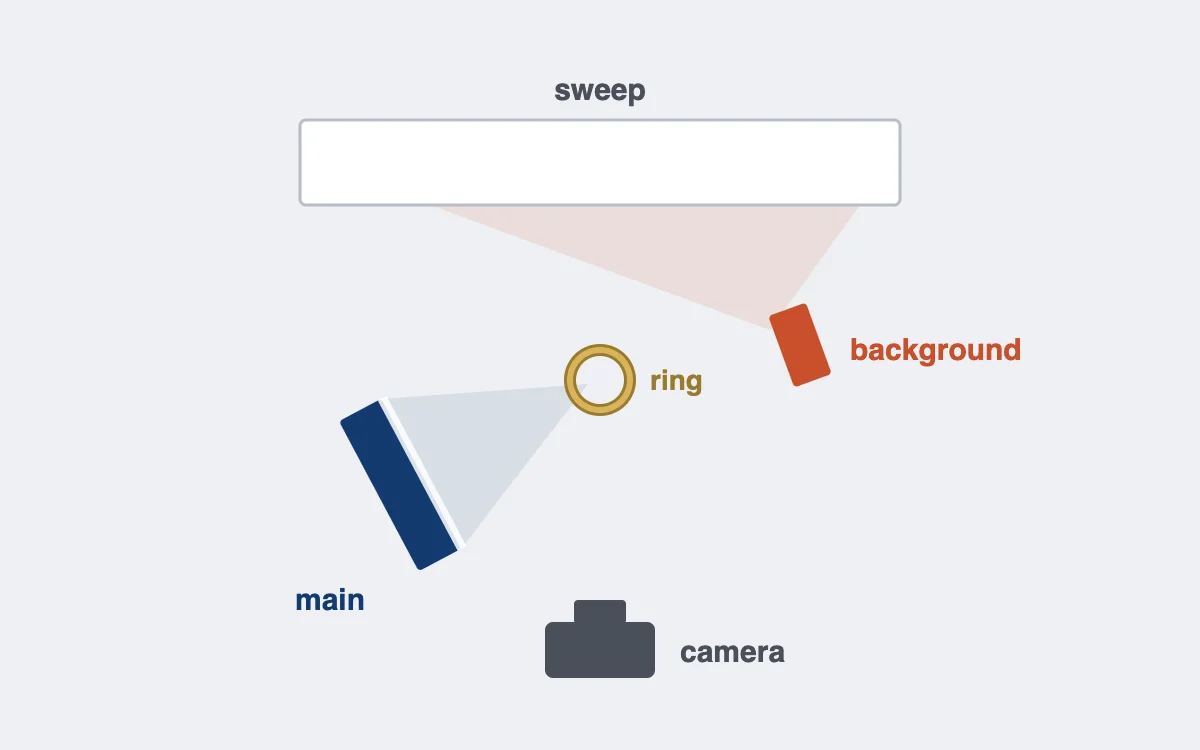
- For white, aim a second light at the sweep behind the piece, about one stop brighter than the light on the piece.
- For black, flag the light so it hits the piece only; a black card between the light and the backdrop is enough.
- Keep the background light from shining into the lens: it lowers contrast across the whole frame.
Step 5: Test, check at 100% and lock the setup (5 min)
A test frame tells you whether the background will clean up easily or fight you.
- Shoot one frame with the gray card beside the piece.
- Check the histogram: on white, the background should sit close to the right edge without touching it, and the metal should keep detail.
- Zoom to 100% and look for dust, creases and color in the metal that came from the background.
- Write down the distances and light settings, so the next shoot matches this one.
Jewelry photography background ideas for lifestyle shots
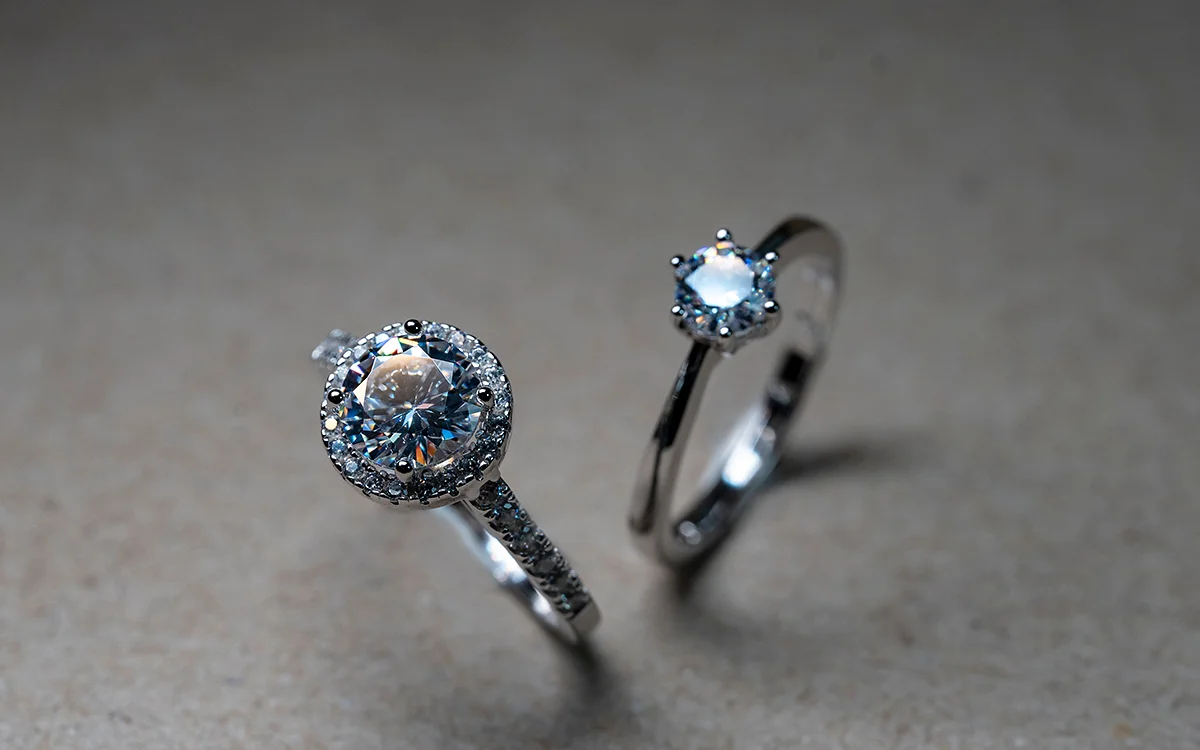
Lifestyle backgrounds follow the same rule: whatever is under the piece shows up in the metal. A few that work:
- Slate or dark stone for gold, which glows against cool gray.
- Raw linen or paper for handmade and oxidized pieces.
- Pale marble for diamonds and white gold, kept matte so it doesn’t reflect the room.
- A model’s skin for scale: neck, wrist or hand, in soft window light.
Common mistakes
Most background problems we see in client files start at the shoot. These six cause most of them.
| Mistake | What it looks like | Fix |
|---|---|---|
| Overexposing to get pure white | Blown highlights and dead stones | Light the background separately and finish to white in editing |
| Colored backdrop for a listing | Metal tinted by the backdrop | White or gray for anything a buyer compares |
| Piece too close to a black backdrop | Gray, uneven black | Move the piece 50 cm or more in front of it |
| Glossy surface by accident | The room reflected in the band | Matte paper or card unless you want the reflection |
| Different backgrounds across a collection | A shop grid that looks like several brands | One background per collection, written down |
| Dusty or creased sweep | Specks and lines at 100% | Tear off or wipe the sweep before each piece |
Shoot it yourself, or outsource the finish?
Setting up your own background makes sense for almost every shop. The kit costs little, and a written-down setup repeats for every piece.
| Doing it yourself works when | Outsourcing works when |
|---|---|
| Your own shop accepts a light gray background | Marketplaces need pure white on every image |
| You add a few pieces a month | A collection of hundreds launches at once |
| Most pieces are matte or simple | Polished metal and stones need clean edges |
| One person shoots every image | Several shoots have to match one background |
Editing time is what grows with volume. Cutting out a polished piece, taking the background to pure white and keeping a natural shadow takes 10 to 30 minutes per image. Two hundred images is 33 to 100 hours. The capture side of every shot is in our guide on how to photograph jewelry.
At that volume, a professional jewelry retoucher gives those hours back. Our studio has retouched jewelry by hand since 2010, with more than 60 retouchers on jewelry alone. Every image gets a second check at 100% zoom, and full-resolution files come back, most within 24 hours.
To see the finish on your own pieces, send us your trial images. It’s free, with no card or sign-up.
Frequently asked questions
For listings, a matte white or light gray sweep, because it keeps metal and stone color true and every marketplace accepts it. For hero and social images, black suits diamonds and polished silver, and textured surfaces suit lifestyle shots.
Use white for product listings and marketplaces, and black for hero images where polished metal and diamonds need contrast. Many shops shoot both: white for the listing, black for the website and social posts.
Light the background separately, about one stop brighter than the piece, so it reads close to white while the metal keeps its detail. Then take it to pure white in editing. Overexposing in camera to get there blows out the metal and the stones.
Yes, the background behind the piece can be cut out and replaced. What can’t be changed cleanly is what the metal reflected: a colored or dark surface shows inside a polished band, so choose the background before you shoot.
Gold reads warm and true on white or light gray for listings, and glows against dark slate or charcoal for lifestyle images. Avoid blue and green backgrounds, which reflect into the metal and make it look dull.